 WEWE Kitchen Faucets
Is a Hand Held Shower Head on Rail the Best Upgrade for Your Shower in 2026?
Views:42 classificationProduct
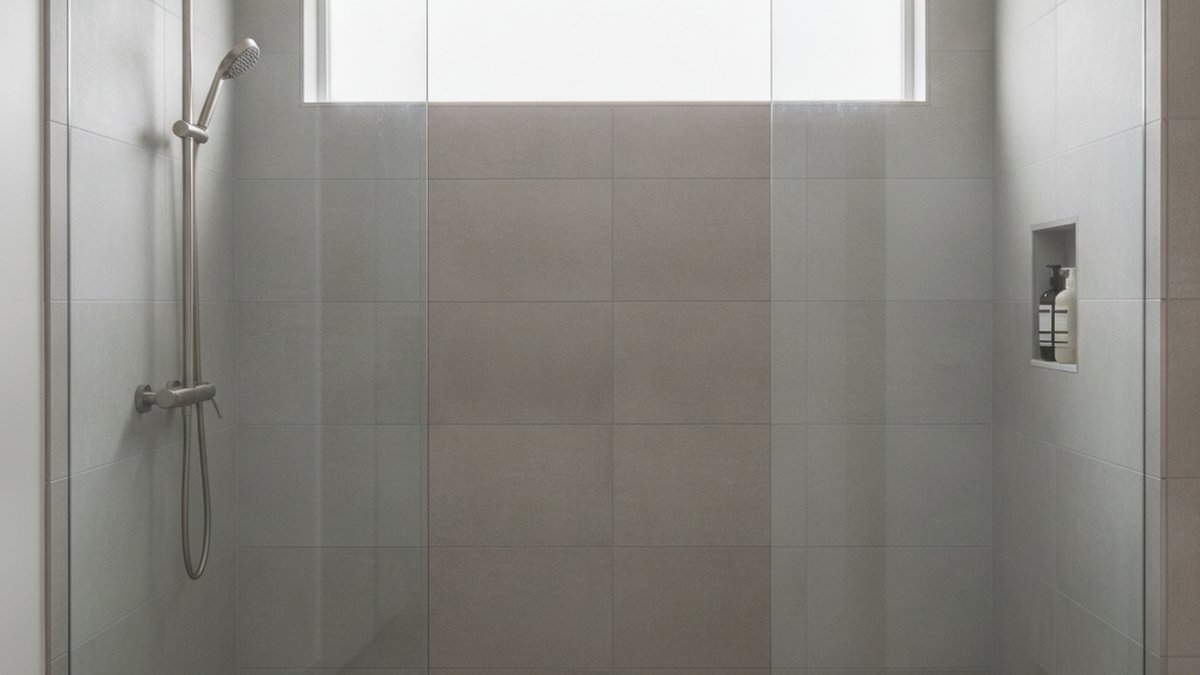
If you have been searching for a hand held shower head on rail setup, you are really asking one practical question: can one fixture give you a proper overhead-style shower and a detachable wand without a full remodel? The short answer is yes. A rail (also called a slide bar) mounts vertically on the wall, a bracket rides up and down that rail, and your handheld sprayer clicks into the bracket. Slide it up to shower standing, slide it down to bathe a toddler, or pull it off entirely to rinse the walls. It is one of the cheapest, highest-impact shower upgrades you can do yourself.
Below I will walk through who actually benefits from a rail setup, how it compares to a fixed head and a simple wall hook, what specs matter, how high to mount it, and how to install one. I have specified and tested these systems for years, so this is the buyer’s guide I wish more shoppers had before they clicked “add to cart.”
What exactly is a hand held shower head on rail, and how is it different from a regular handheld?
A hand held shower head on rail is a handheld sprayer paired with a wall-mounted slide bar, so the wand can lock in at any height instead of sitting in a single fixed holder. A plain handheld usually clips into one bracket screwed to the wall or to the shower arm, which means one height for everyone. The rail solves the height problem: a 6’2″ adult and a 4’0″ child can each set the sprayer where it hits them right.
The system has four parts working together:
- The slide bar (rail): a vertical metal bar, typically 24 to 36 inches long, anchored to the wall at two points.
- The sliding bracket: a clamp that locks anywhere along the rail with a lever or knob and cradles the sprayer, usually adjustable in angle.
- The handheld sprayer: the wand itself, with spray modes ranging from a single rain setting to 5, 6, or 7 patterns.
- The hose: a flexible stainless or reinforced PVC hose, 59 to 79 inches, that connects the sprayer to the water outlet.
Because the water still feeds from your existing shower arm or a wall outlet, you rarely need to open the wall. That is the key reason this upgrade is DIY-friendly compared with adding a rain head, which often means new rough-in plumbing.
Who actually needs a slide bar, and who can skip it?
You need a rail if more than one person of very different heights uses the shower, if you bathe kids or pets, if anyone in the home has limited mobility, or if you like to sit on a bench and shower. In all of those cases, the ability to reposition the sprayer without holding it is the whole point.
You can probably skip the rail and buy a simple handheld with a single bracket if you are the only user, you always shower standing, and your bathroom is small enough that one fixed height works fine. A basic handheld-plus-hook combo costs less and installs in fifteen minutes.
Here is the honest middle ground: even solo users tend to love the rail once they have it, mostly for cleaning. Being able to slide the sprayer down and rinse soap scum off the floor and glass is a small luxury that pays for itself in scrubbing time. If your budget allows the extra $20 to $40, the rail is the version most people keep.
Hand held on rail vs. fixed shower head vs. wall hook — which should you buy?
Buy the rail system if you value flexibility and multiple users; buy a fixed head if you want the simplest wall look and never detach the sprayer; buy the plain wall hook only if budget is the sole priority. The table below lays out the real trade-offs so you can match the setup to your bathroom.
| Feature | Handheld on Rail | Fixed Shower Head | Handheld + Wall Hook |
|---|---|---|---|
| Height adjustable | Yes — infinite along bar | No | No — one fixed hook |
| Detachable wand | Yes | No | Yes |
| Good for kids / pets / seated use | Excellent | Poor | Fair |
| Ease of cleaning the stall | Excellent | Poor | Good |
| Typical install time | 45–75 min | 10 min | 15 min |
| Typical price range | $45–$180 | $25–$120 | $30–$90 |
| Wall drilling required | Yes (2 anchor points) | No | Usually 1 screw |
The fixed head wins only on speed and simplicity. The rail wins everywhere flexibility matters. And notice the price overlap — a good rail system is not dramatically more expensive than a nice fixed head, which is why it is my default recommendation for family bathrooms. If you are weighing a bigger overhaul instead, our rundown of which shower system brands are actually worth buying in 2026 covers the combo units that pair a rain head with a handheld on a rail.
How high should you mount the shower rail?
Mount the top of the slide bar about 72 to 78 inches from the shower floor, and the bottom bracket roughly 40 to 48 inches up, so the sprayer’s full travel covers everyone from a seated child to a tall adult. That range lets the highest docking position sit a few inches above the tallest user’s head, which is where a fixed-style overhead spray feels most natural.
A few practical rules make this easier:
- Find your studs or use proper anchors. A rail takes real force when someone bumps it or grabs it, so both mounting points must hit a stud or a heavy-duty toggle/tile anchor rated for the load.
- Set the top mount first. Position it so the highest sprayer angle clears the tallest household member by 3–4 inches.
- Keep it plumb. Use a level — a crooked rail is the most common DIY tell and it makes the bracket bind.
- Mind the water outlet. Make sure your hose reaches the rail’s full height with slack to spare; a 59-inch hose is the practical minimum, 71–79 inches is more forgiving.
If you want the same logic applied to a rain head, we go deeper on ceiling and wall geometry in our guide to the right rainfall shower head mounting height. The core principle — spray should clear the tallest user — carries straight over to a slide bar.
What specs actually matter when buying a handheld on a rail?
The specs that separate a fixture you’ll love from one you’ll replace in a year are the bracket material, the flow rate, the hose, the rail diameter, and the finish. Here is what to check before you buy, in order of importance.
Flow rate and spray modes
In the U.S., shower heads are capped at 2.5 gallons per minute (GPM), and many WaterSense-labeled models run at 1.8 GPM to save water without feeling weak. For a handheld, a strong “massage” or “jet” mode matters more than a huge number of settings — three genuinely useful patterns beat seven gimmicky ones. If your home has low pressure, avoid ultra-low-flow heads that will feel like a drizzle.
Bracket and rail build quality
The sliding bracket is where cheap systems fail. A plastic clamp that grips a plastic-coated bar will slip within months, dropping your sprayer mid-shower. Look for a metal (brass or stainless) bracket with a solid lever lock, and a rail at least 22 mm in diameter so it doesn’t flex. This one part is worth paying up for.
Hose length and construction
A stainless-steel double-interlocked hose resists kinking and lasts far longer than thin PVC. Length should be 59 inches minimum; 71–79 inches gives you reach to rinse feet, bathe a dog, or hand the wand to a seated user. Check that the fittings are brass, not plastic, and that they include cone washers to seal cleanly.
Finish
Match the finish to your existing valve trim and faucet. Chrome and brushed nickel are the safest, most durable, easiest to clean, and most widely stocked. Matte black and brushed gold look great but show water spots faster and cost more. The finish table below sums it up.
| Finish | Best for | Water-spot resistance | Relative cost |
|---|---|---|---|
| Polished chrome | Bright, classic, budget builds | Good | $ |
| Brushed nickel | Hiding spots and fingerprints | Excellent | $$ |
| Matte black | Modern, high-contrast bathrooms | Fair | $$$ |
| Brushed gold / champagne bronze | Warm, high-end vanities | Good | $$$ |
How do you install a hand held shower head on a rail yourself?
You can install most rail systems in under an hour with a drill, a level, a tape measure, and thread-seal tape — no plumber and no opening the wall, because the hose simply threads onto your existing shower arm. Here is the reliable sequence.
- Turn off the shower and dry-fit everything. Hold the rail against the wall to confirm your top and bottom mount heights and check reach with the hose.
- Mark and drill the mounting holes. Level the rail, mark both brackets, and drill for studs or tile anchors. In tile, use a carbide or diamond bit and go slow to avoid cracking.
- Anchor the rail. Set anchors, screw the mounting brackets tight, then snap the rail’s decorative covers over them.
- Connect the water. If you feed from the shower arm, wrap the arm threads with thread-seal tape and hand-tighten a hose elbow or the hose directly, then snug a quarter turn with a cloth-wrapped wrench. Add the cone washer at each hose end.
- Mount the sprayer and test. Clip the sprayer into the sliding bracket, turn the water on, and check every joint for drips. Tighten any weeper another eighth of a turn.
If your rail feeds from a wall outlet behind a trim plate rather than a shower arm, the fitting is different, and it helps to understand the trim behind the wall. Our step-by-step on how to install a shower faucet trim kit yourself covers that valve-side work so your rail connects to a clean, leak-free outlet. And if you like to see the motion before you buy, a short walkthrough like the ones in our rainfall shower head YouTube guide makes the bracket-and-hose mechanics obvious in about two minutes.
How much should you spend, and where’s the sweet spot?
The value sweet spot for a hand held shower head on rail is roughly $60 to $110, where you get a metal bracket, a stainless hose, and a solid multi-function sprayer without paying for a designer name. Below $45 you start seeing plastic brackets that slip and thin hoses that kink; above $150 you are usually paying for premium finishes or a matched brand suite rather than better function.
Spend the extra money on the parts you touch every day — the bracket lock and the sprayer — and save on the parts you don’t, like decorative rail covers. A $70 system with a great bracket will outlast a $130 one with a beautiful finish and a flimsy clamp.
Author note & why you can trust this guide
This guide was written by the wewefaucet product team, drawing on years of specifying, bench-testing, and installing shower fixtures across residential and light-commercial projects. We pressure-test handheld sprayers and slide-bar brackets for slip resistance and leak integrity, and we cross-check every recommendation against U.S. water-efficiency standards — WaterSense labeling and the 2.5 GPM federal maximum. wewefaucet backs its shower fixtures with a manufacturer warranty and ships parts that meet standard 1/2-inch NPT connections, so replacements and repairs stay simple down the road. When we say a spec matters, it is because we have seen what fails when it is ignored.
FAQ
Can I put a handheld shower head on a rail without replacing my whole shower?
Yes. In most showers the rail mounts to the wall and the hose threads onto your existing shower arm or wall outlet, so you keep your current valve and plumbing. The only new holes are the two anchor points for the slide bar, which is standard DIY work.
Will the sliding bracket hold the sprayer, or does it slip down over time?
A quality metal bracket with a lever or cam lock holds firmly for years. Slipping is almost always a symptom of a cheap plastic clamp on a plastic-coated bar. Buy a brass or stainless bracket on a rail at least 22 mm thick and you won’t have this problem.
What length rail and hose should I get for a family bathroom?
Choose a rail 24 to 36 inches long so the sprayer can travel from a seated child’s height to a tall adult’s, and a hose of at least 59 inches — 71 to 79 inches is better for bathing kids or pets. Longer hoses give you reach without straining the fittings.
Does a handheld on a rail work with low water pressure?
It can, but choose your sprayer carefully. Avoid ultra-low-flow heads under 1.8 GPM if your pressure is already weak, and favor a sprayer with a concentrated jet or massage mode, which feels stronger at low pressure than a wide rain pattern. A stainless hose with a smooth bore also helps preserve pressure.
Can I mount the rail on tile without cracking it?
Yes, with the right tools. Use a carbide or diamond-tipped drill bit, run the drill slowly with light pressure, and set proper tile anchors rated for the bracket load. Mark and center-punch your holes first, and keep the rail plumb with a level so the bracket doesn’t bind as it slides.
Is a handheld on a rail better than a fixed rain head?
They solve different problems. A fixed rain head delivers a wide, drenching overhead spray but can’t be moved or detached; a handheld on a rail offers height flexibility, a detachable wand for cleaning and bathing, and easier installation. Many people get both by choosing a combo shower system that pairs a rain head with a handheld on a slide bar.
您好!please sign in