 WEWE Kitchen Faucets
How Do You Remove a Kitchen Faucet Base Without Wrecking Your Sink?
Views:47 classificationInstall
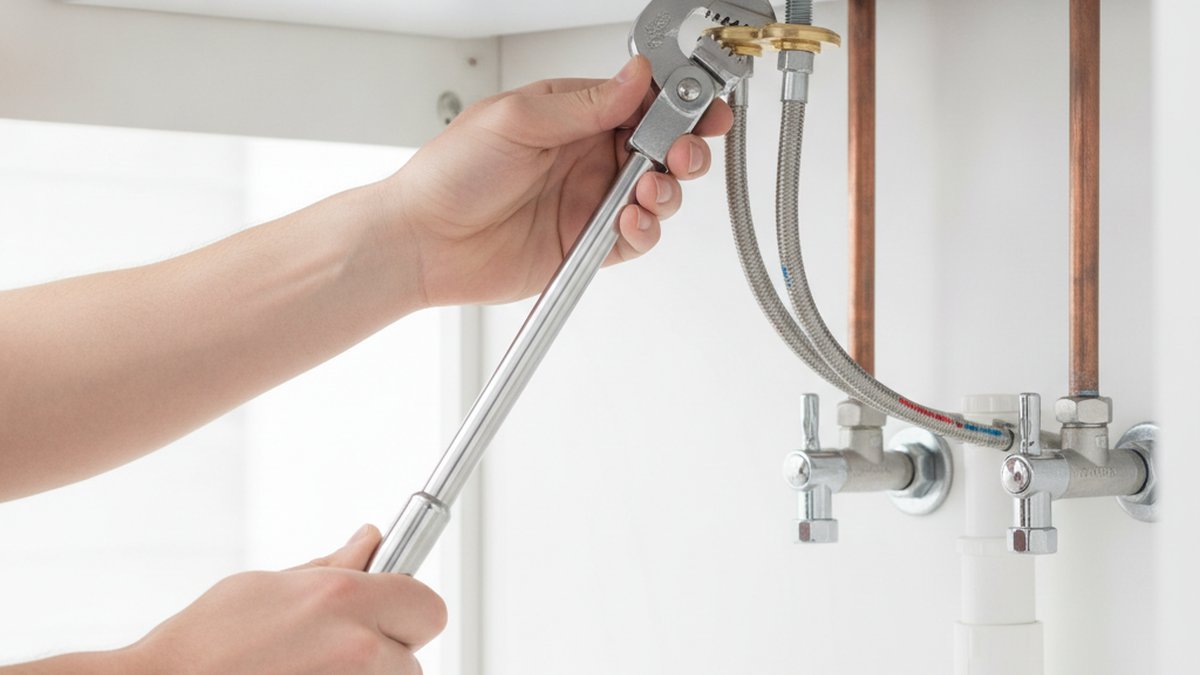
Learning how to remove a kitchen faucet base is the one step that trips up most DIYers, because the base plate (also called an escutcheon or deck plate) and the faucet body are held down from underneath the sink by a nut you can barely see, and they’re usually glued to the deck with old putty or silicone that has hardened over the years. Once you understand those two anchors — the mounting nut below and the seal above — the whole thing comes off cleanly. Below is exactly how to do it, what tools you actually need, how to handle a base that won’t budge, and how to avoid the mistakes that scratch a sink or crack a countertop.
What tools do I need to remove a kitchen faucet base?
You need a basin wrench, an adjustable wrench, a bucket, a flashlight or headlamp, a putty knife, and a rag — that’s the core kit. The basin wrench is the non-negotiable one: its swiveling, spring-loaded jaw is the only thing that reaches the mounting nut in the cramped space behind the sink bowl. Everything else you probably already own.
Here’s the full list, and why each one earns its spot:
- Basin wrench (10″–17″) — reaches up behind the sink to grip the mounting nut you can’t get to with a normal wrench.
- Adjustable wrench or channel-lock pliers — for the supply-line coupling nuts at the shutoff valves.
- Putty knife or plastic scraper — to slice through the old putty/silicone seal and later clean the deck.
- Penetrating oil (PB Blaster or WD-40) — for a corroded, seized mounting nut.
- Bucket and towels — the supply lines and faucet body hold trapped water that will spill.
- Headlamp — under-cabinet space is dark; you want both hands free.
- Safety glasses — you’re working face-up under a cabinet where grit and old sealant fall straight down.
If your faucet uses a plastic quick-connect deck hose or push-fit fittings rather than threaded nuts, the removal is slightly different — our guide on how to remove a Glacier Bay kitchen faucet quick connect without breaking it walks through those press-tab fittings in detail.
How do I remove a kitchen faucet base step by step?
Shut off the water, disconnect the supply lines, unscrew the mounting nut under the sink, break the seal on top, and lift the base out — in that order. Doing it out of order (say, cutting the seal before the nut is loose) is what leads to a cracked deck plate or a bent supply line. Here’s the sequence in full.
- Turn off the water. Reach under the sink and close both shutoff valves (turn clockwise). No under-sink valves? Shut off the main. Then open the faucet to release pressure and let it drain.
- Disconnect the supply lines. Put your bucket under the connections. Use the adjustable wrench to loosen the coupling nuts where the braided lines meet the shutoff valves (or the faucet shanks). Expect a little trapped water.
- Disconnect the sprayer hose and any weight. On a pull-down or pull-out faucet, unclip the counterweight and detach the quick-connect on the spray hose so the hose can pass back up through the deck.
- Find and loosen the mounting nut. Look straight up under the faucet — you’ll see a large plastic or brass nut (sometimes a threaded mounting bracket with a wing screw) clamping the base to the sink. Fit the basin wrench jaw onto it and turn counterclockwise. This is where the basin wrench pays for itself.
- Free any locator/anti-rotation pins. Many modern faucets have a small tab or pin that keeps the base from spinning. Once the nut is off, that’s usually already free.
- Break the top seal. Go back above the sink. Grip the base and rock it firmly side to side to crack the old putty or silicone. If it won’t move, run a putty knife around the edge to slice the bead.
- Lift the faucet and base straight up. Pull the whole assembly (faucet + deck plate) up and out. Feed the hoses and shanks up through the mounting holes as you go.
- Scrape the deck clean. Remove every trace of old putty, silicone, gunk, and mineral crust so your new faucet seats flat and seals properly.
Why won’t my kitchen faucet base come off — and how do I free a stuck one?
A stuck base almost always comes down to one of two things: a corroded or over-tightened mounting nut underneath, or a hardened silicone/putty seal on top that’s acting like glue. Fix the right one and the base lifts right out. Attacking it with brute force usually just scratches the sink or snaps a plastic nut.
Work through the causes in this order:
| Symptom | Likely cause | Fix |
|---|---|---|
| Nut turns but won’t loosen, or is rounded | Corrosion / mineral buildup on threads | Spray penetrating oil, wait 15–20 min, retry. Use a proper basin wrench for full grip. |
| Plastic nut cracks or spins | Over-tightened or brittle with age | Cut it off with a hacksaw blade or oscillating tool, then replace it. |
| Nut is off but base won’t lift | Hardened silicone or plumber’s putty seal | Slice the bead with a putty knife or utility knife, then rock the base side to side. |
| Base is fused to a metal sink | Galvanic corrosion between dissimilar metals | Apply penetrating oil around the base, wait, then tap the base gently with a rubber mallet. |
| Nut won’t budge at all | Seized steel-on-steel threads | Oil + heat from a hair dryer, or cut the nut as a last resort. |
The single most common blocker is that hardened seal. People remove the nut, tug straight up, feel nothing move, and assume they missed a fastener — when really the base is just cemented down. Running a thin putty knife all the way around the base and then rocking it firmly (not lifting) breaks that bond every time. If your problem is a genuinely seized threaded fastener rather than a seal, the same penetrating-oil-and-patience approach we cover for a stuck outdoor faucet handle screw applies here too.
Single-hole vs. three-hole base: does removal differ?
Yes, but only slightly — a single-hole faucet has one mounting nut and an optional deck plate covering the extra holes, while a widespread three-hole setup may have the base and faucet body anchored separately. In both cases you’re still loosening nuts from below and breaking a seal on top; the three-hole version just has more fasteners to find.
Here’s what actually changes between the two:
- Single-hole faucet: One central mounting nut holds everything. The deck plate (escutcheon) usually just clips or is bedded in putty over the 8″ holes. Remove the nut, break the plate’s seal separately, done.
- Three-hole / widespread faucet: The spout and each handle can have their own shank and nut. Loosen all of them before you try to lift anything, or you’ll fight a base that’s still tied down at one corner.
- Bridge faucets: Two shanks plus a connecting bridge — disconnect the bridge coupling first if it’s separate.
If you’re removing the old faucet as a prelude to buying a new one, this is the perfect moment to confirm your hole spacing and spout reach so the replacement fits. Our guide on what size faucet you actually need for a kitchen sink covers matching the new faucet to your existing deck holes, and how to measure faucet supply line size the right way makes sure your new supply lines actually thread on without an adapter scramble.
How do I clean the sink deck and prep for a new faucet base?
Scrape off every bit of old putty and silicone, wipe the deck with a mild cleaner or rubbing alcohol, and dry it completely before setting the new base — a clean, flat, dry surface is what makes the new gasket or bead seal without leaking. Skipping this step is the number-one reason a brand-new faucet drips around the base within a week.
Do it in this order:
- Use a plastic scraper or putty knife to lift off old silicone and putty. Plastic won’t gouge a stainless or enameled sink.
- Wipe away mineral crust and grease with a bathroom-safe cleaner. For stubborn hard-water scale, a vinegar-dampened cloth works well.
- Do a final wipe with rubbing alcohol to remove any residue, then dry fully.
- Inspect the deck for cracks or rust around the holes — now’s the time to catch a problem, while everything’s exposed.
Whether you re-bed the new base in fresh plumber’s putty or use the rubber gasket that came with the faucet depends on the manufacturer — many modern faucets specifically say to use only the supplied gasket and no putty (putty can stain some stone counters and isn’t needed with a good gasket). Follow your new faucet’s instructions here; when they conflict with old-school habits, the instructions win. For keeping your new fixture spotless afterward, a gentle finish-safe routine like the ones in our guide to the best faucet cleaners for chrome and brushed finishes keeps the deck seal area clean without corroding it.
Do I need to call a plumber, or is this really a DIY job?
For a standard kitchen faucet, this is a genuine DIY job — the average homeowner can remove a faucet base in under an hour with a basin wrench and no special skills. You’d only want a plumber if the shutoff valves themselves are corroded and leaking, if the supply lines are old rigid copper that needs re-soldering, or if you hit a seized nut on a pedestal you can’t safely cut.
Call a pro if any of these are true:
- Your shutoff valves won’t close or start weeping when you touch them — that’s a valve replacement, a separate job.
- The supply lines are hard-soldered copper rather than braided flex lines.
- You have no under-sink shutoffs and aren’t comfortable shutting off and draining the whole house main.
- The mounting hardware is so corroded that cutting it risks damaging the sink or counter.
Everything short of that is well within reach of a careful DIYer. The two things that separate a smooth job from a frustrating one are simply owning a real basin wrench and giving penetrating oil enough time to work on a stubborn nut.
How long does it take and how much does it cost?
Removing a kitchen faucet base takes 20–45 minutes for most people and costs almost nothing if you own a basin wrench (about $15–$25 if you don’t). A plumber charging to remove and replace a faucet typically runs $150–$350 in labor, so doing the removal yourself is where the real savings live.
Rough breakdown of time and cost:
| Scenario | Time | Your cost (DIY) |
|---|---|---|
| Standard faucet, cooperative nut | 20–30 min | $0 (own tools) |
| Corroded nut needing penetrating oil | 45–60 min | ~$8 (penetrating oil) |
| Nut must be cut off + replaced | 60–90 min | ~$10–$20 (hardware) |
| Plumber does removal + install | 1–2 hrs | $150–$350 labor |
FAQ
Can I remove a kitchen faucet base without a basin wrench?
Sometimes, but it’s much harder. If the mounting nut is a large plastic wing-nut style, you may be able to loosen it by hand or with channel-lock pliers. For a standard nut set deep behind the bowl, though, a basin wrench is really the only tool that reaches and grips it. At $15–$25, it’s cheaper than one plumber service call and you’ll reuse it.
Do I have to turn off the water to remove a faucet base?
Yes, always. Close both under-sink shutoff valves (or the main if you don’t have them), then open the faucet to relieve pressure and drain the lines. Skipping this step means a pressurized spray the moment you loosen a supply line — a guaranteed mess and possible water damage inside the cabinet.
What is the nut called that holds a kitchen faucet base down?
It’s the mounting nut (sometimes called the lock nut or basin nut). On many faucets it’s paired with a mounting bracket or a threaded plastic collar. It threads onto the faucet’s shank from below the sink and clamps the base plate tight against the deck. That’s the one you loosen with a basin wrench.
How do I remove a faucet base that’s stuck with old silicone or putty?
Once the mounting nut is off, run a putty knife or utility blade all the way around the base of the faucet to slice through the hardened sealant, then grip the base and rock it firmly side to side rather than pulling straight up. The rocking motion cracks the bond. A little penetrating oil around the seam helps if it’s really cemented.
Will removing the faucet base damage my sink or countertop?
It shouldn’t if you use plastic scrapers instead of metal blades on the sink surface and avoid prying against the counter for leverage. The two real risks are gouging a stainless sink with a screwdriver and cracking a stone countertop by forcing a fused base. Break the seal with a proper putty knife and rock the base loose gently, and both risks disappear.
About the author: This guide was written by the wewefaucet product and installation team, drawing on hands-on testing of hundreds of kitchen and bathroom faucet installations and removals across single-hole, widespread, and pull-down configurations. wewefaucet designs and sells kitchen and bathroom fixtures built to U.S. plumbing standards, and every faucet we ship is pressure- and finish-tested before it leaves the line and backed by our warranty — so when it’s time to install your replacement, the mounting hardware and gaskets are engineered to seat cleanly the first time.
您好!please sign in