 WEWE Kitchen Faucets
How Do You Remove a Stuck Outdoor Faucet Handle Screw Without Stripping It?
Views:307 classificationRepair
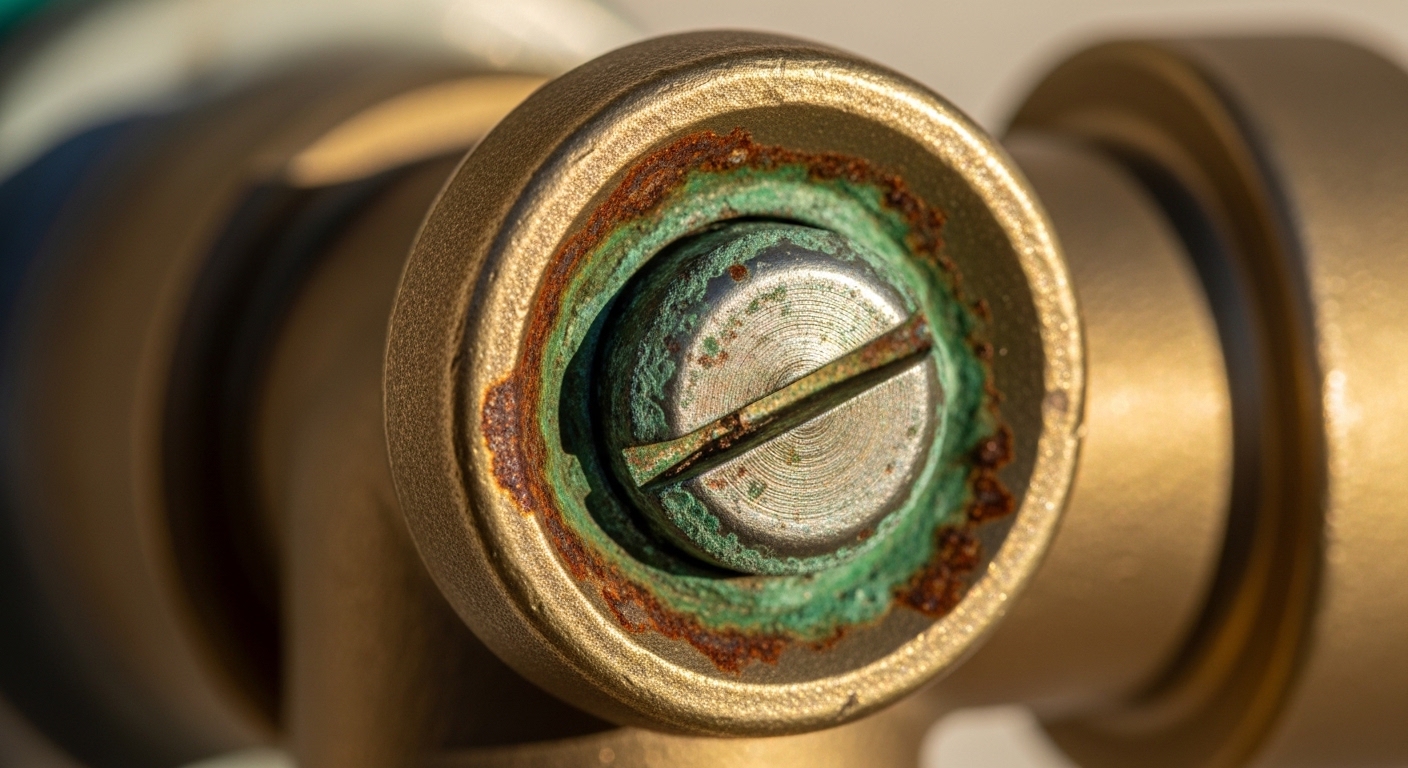
If you’re standing at your hose bib with a screwdriver that keeps slipping, you already know the hardest part of any outdoor faucet repair: you have to remove the stuck outdoor faucet handle screw before you can touch the packing nut, the stem, or the washer causing that drip. Outdoor faucets (also called hose bibs, sillcocks, or spigots) live outside in rain, frost, and years of mineral-laden water, so their handle screws corrode, mineralize, and seize far worse than any indoor fixture. The good news: with the right sequence — penetrating oil, the correct bit, heat, and a little patience — nearly every one of these screws comes out without you drilling anything. Below is exactly how, in the order a plumber would actually do it.
Why is the handle screw on an outdoor faucet so hard to remove in the first place?
It’s stuck because of three things working together: corrosion, mineral scale, and dissimilar-metal galvanic bonding. Outdoor faucet handles are usually a steel or brass screw threaded into a brass or zinc stem. Water, oxygen, and time turn that junction into a chemical weld.
Here’s what’s actually happening under that head:
- Galvanic corrosion: a steel screw in a brass stem creates a tiny battery whenever moisture is present. Over years, that reaction fuses the threads.
- Mineral scale: hard water leaves calcium and lime deposits that pack into the threads like cement.
- Rust expansion: a rusting steel screw actually grows in volume, wedging itself tighter into the handle bore.
- A softened, painted, or stripped head: decades of a screwdriver “almost” fitting rounds out the slot or Phillips cross, so your tool can no longer bite.
Understanding this matters because it tells you the fix: you don’t win by muscling harder (that strips the head). You win by breaking the chemical bond first — oil and heat — then applying controlled, high-downforce torque. This is the same logic behind fixing other corrosion problems on aging plumbing, like when you find rust coming out of your faucet and trace it back to a decaying valve or supply line.
What tools do I actually need to remove a rusted spigot handle screw?
You need penetrating oil, the correct-size screwdriver or bit, and something for downforce — that’s the core kit, and it handles most jobs for under $30. The rest are escalation tools for when the screw fights back.
| Tool | What it does | When you need it | Rough cost |
|---|---|---|---|
| Penetrating oil (PB B’laster, Kroil, Liquid Wrench) | Wicks into threads and breaks rust/scale bond | Always — start here | $7–$12 |
| Correct-fit screwdriver or hex/Torx bit | Full contact so torque transfers, not slips | Always | $5–$15 |
| Manual impact driver | Converts hammer blow into sharp rotational shock | Screw won’t budge or head is softening | $20–$30 |
| Locking pliers (Vise-Grips) | Grips a raised or stripped screw head to twist it | Head sticks up above the handle | $12–$20 |
| Heat source (heat gun or small torch) | Expands metal and cracks scale/corrosion | Oil alone didn’t free it | $0–$40 |
| Screw extractor set (EZ-Out) | Reverse-threaded bit bites into a drilled pilot hole | Head fully stripped — last resort | $10–$25 |
| Rubber band / valve-grinding compound | Adds grip between bit and stripped head | Slight cam-out, not full strip | $0–$8 |
One quiet tip most tutorials skip: match your screwdriver to the screw exactly. A #2 Phillips in a #1 slot, or a slightly narrow flathead, is the single biggest cause of stripped outdoor faucet screws. If the head is a hex or Torx, don’t force a “close enough” bit — the whole game here is full metal-to-metal contact.
How do I remove a stuck outdoor faucet handle screw step by step?
Work in this exact order — each step escalates only if the previous one fails, which protects the screw head from stripping. Most people succeed by step 4.
- Shut off the water. Close the indoor shutoff valve feeding the outdoor line (often in the basement, crawlspace, or utility room), then open the outdoor faucet to relieve pressure. This keeps you from a surprise soaking once the handle comes off.
- Clean the screw head. Use a stiff wire brush and a pick to clear paint, dirt, and corrosion out of the slot or cross. Your tool can’t seat in a clogged head.
- Soak with penetrating oil. Apply generously right at the screw base and let it wick in for 15–20 minutes — longer for heavy rust. Tap the screw head lightly with a hammer a few times; the vibration helps the oil travel into the threads.
- Seat the correct bit and push hard. Aim for roughly 70% downward pressure, 30% turning force. Press the screwdriver into the head like you’re trying to punch through it, then turn slowly counterclockwise. That downforce is what stops cam-out.
- Add shock. Still stuck? Load the correct bit into a manual impact driver, hold it firmly against the screw, and strike the back with a hammer. The tool delivers a sharp twist at the instant of impact — this frees the majority of seized screws.
- Apply heat. If it still won’t move, warm the handle/stem area with a heat gun (or briefly with a small torch, keeping flame away from anything flammable and off any plastic). Heat expands the metal and cracks the corrosion bond. Let it cool slightly, re-oil, and try the turn again.
- Grip the head directly. If the head protrudes, clamp locking pliers onto it and twist. This bypasses a stripped slot entirely.
- Extract as a last resort. If the head is fully rounded, center-punch it, drill a small pilot hole, insert a screw extractor, and turn counterclockwise to bite and back it out.
What if the screw head is already stripped or the screw snaps off?
If the head is stripped, don’t keep spinning your screwdriver — you’ll only polish it smooth. Switch to a grip-or-extract method: locking pliers on a raised head, a rubber band or valve-grinding compound packed into a shallow-stripped head for extra bite, or a screw extractor for a fully rounded one.
If the screw snaps off flush or below the surface, you have two realistic paths:
- Left-hand drill bit: drilling counterclockwise into the broken shank often grabs and spins the remnant right out, because the drilling direction is also the loosening direction.
- Screw extractor into a pilot hole: center-punch the broken screw, drill a small pilot, then thread in the reverse-cut extractor.
Honest reality check: if the screw shears off deep inside the stem, or the handle bore cracks, the smart move is often to replace the entire hose bib rather than fight a broken fragment. Outdoor faucets are inexpensive, and a fresh one comes with a clean, non-corroded screw and stem. If you’re comfortable measuring and swapping supply connections — the same skill you’d use to measure faucet supply line size correctly — a full spigot replacement is a very approachable afternoon job.
Should I use heat, and is it safe on a brass outdoor faucet?
Yes, heat is one of the most effective ways to free a seized screw, and it’s safe on brass and steel if you’re careful — but keep flame off plastic parts, painted siding, and anything flammable. Brass has a high melting point (around 1,700°F / 900°C), so a heat gun or a quick pass with a small propane torch won’t harm the faucet body; you’re only warming it enough to expand the metal and crack the corrosion.
Do it right:
- Remove or protect nearby rubber washers and plastic before applying flame.
- Heat for 20–40 seconds, then let it cool for a minute — the expand-then-contract cycle is what breaks the bond.
- Never apply penetrating oil and open flame at the same moment; oil is flammable. Wipe excess, heat, cool, then re-oil.
- Wear gloves — brass holds heat and will burn you well after it stops glowing.
If your faucet sits against vinyl siding or wood trim, a heat gun is the safer choice over a torch. It’s slower but eliminates the fire and scorch risk entirely.
How do I keep the handle screw from seizing again after I fix it?
The fix is one product: anti-seize compound on the threads before you reinstall the screw. This single step is the difference between a screw that comes out easily in five years and one that fuses solid again.
When you reassemble the faucet:
- Clean the threads on both the screw and the stem bore with a wire brush.
- Apply a thin coat of anti-seize (nickel or copper-based) to the screw threads. This blocks moisture and stops galvanic corrosion.
- Consider a brass or stainless replacement screw if the original is rusted steel — matching the screw metal to the brass stem reduces the galvanic reaction.
- Don’t overtighten. Snug is enough; cranking it distorts the handle and makes future removal harder.
While the handle is off, it’s the perfect moment to service the rest of the faucet — replace the rubber washer or the packing to stop drips, since the same corrosion that seized your screw is usually eating the washer too. If your indoor fixtures are also aging, the same maintenance mindset applies to problems like a dripping Delta faucet or a shower faucet that keeps running when turned off — a worn internal part is almost always the culprit, and catching it early saves the harder repair later.
When should I just replace the whole outdoor faucet instead of fighting the screw?
Replace the whole faucet when the screw snaps deep inside the stem, the handle bore cracks, or the faucet body itself is leaking or heavily corroded — at that point a new hose bib (typically $10–$40) is faster and more reliable than salvaging a seized fragment.
Signs it’s time to swap the unit rather than the screw:
- The faucet drips from the spout even when fully closed, and a new washer doesn’t fix it — the seat is likely pitted.
- Water leaks from the packing nut area no matter how you tighten it.
- The body shows cracks (common after a hard freeze) or deep green corrosion.
- You’ve broken the screw off flush and there’s no clean shank to extract.
Modern frost-free sillcocks also protect against burst pipes in winter, so an upgrade often buys you more than just a working handle. If you go this route, shutting off, unthreading, and reconnecting a hose bib uses the same fundamentals as other DIY valve work around the house.
FAQ
What’s the best penetrating oil for a rusted outdoor faucet screw?
PB B’laster, Kroil, and Liquid Wrench are the top performers for rusted, mineralized outdoor hardware. In a pinch, a 50/50 mix of acetone and automatic transmission fluid works remarkably well. Whatever you use, give it 15–20 minutes minimum to wick into the threads, and tap the screw head to help it penetrate. WD-40 works in a light pinch but is a lubricant more than a true penetrant, so it’s less effective on heavy rust.
Can I remove the screw without turning off the water?
You can, but you shouldn’t. On many outdoor faucets the handle screw only holds the handle, not the pressurized stem — so nothing sprays. But if you continue disassembling to reach the packing nut or stem with the water on, you’ll get a face full of pressurized water. It takes 60 seconds to close the indoor shutoff and relieve pressure, and it removes all risk.
How do I remove a screw if the head is completely stripped and round?
Center-punch a dimple in the middle of the head, drill a small pilot hole, insert a screw extractor (EZ-Out), and turn it counterclockwise so its reverse threads bite and back the screw out. If the head still sticks up above the handle, try locking pliers first — clamp hard and twist. For a lightly stripped head, packing a rubber band or a dab of valve-grinding compound into the slot can restore enough grip to avoid drilling at all.
Will heat damage the finish or the internal washers?
Heat won’t hurt the brass or steel body, but it will destroy rubber washers, O-rings, and any plastic components, and it can scorch nearby siding or paint. Before applying a heat gun or torch, remove or shield rubber and plastic parts and protect the wall behind the faucet. Since you’re likely replacing those washers anyway during the repair, melting an old one usually isn’t a real loss.
Why does my outdoor faucet screw keep seizing every few years?
It’s galvanic corrosion — a steel screw in a brass stem, exposed to constant outdoor moisture, forms a slow electrochemical bond. The permanent fix is to coat the threads with anti-seize compound on reassembly and, ideally, use a brass or stainless steel replacement screw so the two metals corrode less against each other. Hard water accelerates the problem, so homes with heavy mineral content should re-service the faucet more often.
Do I need a plumber for this, or is it a DIY job?
For a simple stuck handle screw, it’s firmly a DIY job — the tools cost under $30 and the whole process takes under an hour, most of it waiting for penetrating oil to work. Call a plumber only if the screw snaps deep inside, the stem or body cracks, or you hit a soldered/threaded pipe connection you’re not comfortable working on. Replacing the entire hose bib is also DIY-friendly if you can reach and access the supply line behind the wall.
A note on expertise, testing, and standards
Author note: This guide was written by the wewefaucet product and repair team, drawing on hands-on servicing of hundreds of hose bibs, sillcocks, and indoor fixtures. We’ve stripped, extracted, and replaced enough seized screws to know that patience with penetrating oil beats brute force every time.
Why trust wewefaucet: wewefaucet designs and sells faucets, shower systems, and bathroom fixtures built to hold up in real plumbing conditions — including outdoor and hard-water environments. Our brass fixtures are pressure-tested and their finishes are corrosion-tested to industry durability standards (in line with ASME A112.18.1 / CSA B125.1 for plumbing fittings), and our faucet lines are backed by a manufacturer’s warranty covering finish and function. When we recommend a repair sequence, it reflects both field experience and the same standards our products are held to. Always follow your specific faucet manufacturer’s instructions and local plumbing codes; when in doubt, consult a licensed plumber.
您好!please sign in