 WEWE Kitchen Faucets
What Is the Typical Shower Valve Rough In Height, and How Do You Get It Right?
Views:66 classificationInstall
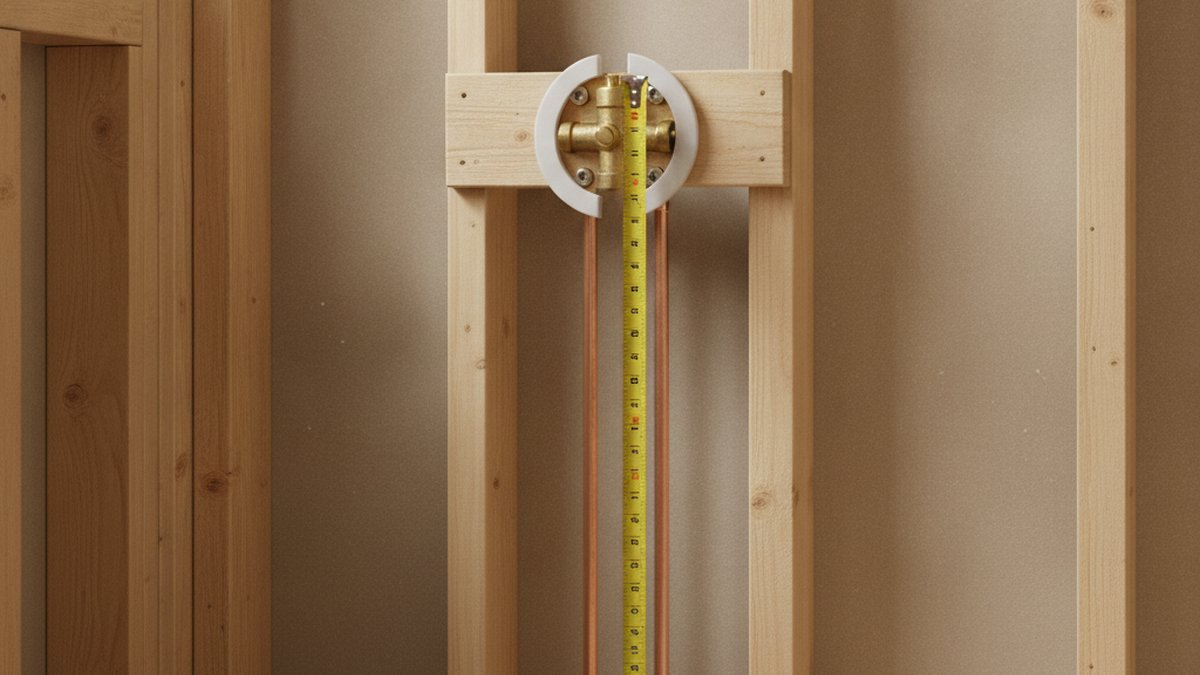
A typical shower valve rough in is the plumbing stage where you install the mixing valve body inside the wall — at the right height, depth, and center — before the drywall, backer board, and tile go up. Get it right and your trim kit sits flush, your handle turns freely, and your showerhead lands where you want it. Get it wrong and you’re cutting open a finished wall to fix a valve that’s buried an inch too deep or mounted three inches too low. This is the one plumbing step that’s genuinely hard to undo, so it pays to measure twice.
Below, we’ll walk through the actual numbers real installers use, the questions homeowners ask most, and the small mistakes that turn a clean install into a callback. This is written for someone standing in a stud bay with a valve in one hand and a tape measure in the other.
What is the standard height for a shower valve rough in?
The standard shower valve rough-in height is 38 to 48 inches above the finished floor, with 45 inches being the most common target for a standing shower. The valve is the control you reach for, so it needs to sit at a comfortable arm height — roughly chest to shoulder level for an average adult.
Here’s how the range breaks down in practice. If your shower includes a tub, the valve usually drops lower — around 28 inches above the tub floor or 8 to 18 inches above the tub rim — because you’re often reaching down to it while seated or bent over. For a walk-in or standing shower with no tub, installers push the valve up to 42–48 inches so you’re not stooping. The showerhead itself gets roughed in separately and much higher — typically 78 inches (6’6″) above the floor, and higher still for tall households.
- Tub/shower combo valve: 28″ above the tub floor (or ~8–18″ above the tub rim)
- Standing shower valve: 42–48″ above the finished floor
- Shower arm / head outlet: 78″ above the finished floor (raise to 80″+ for tall users)
- Tub spout drop: ~4″ above the tub rim, on the same vertical center as the valve
One number people forget: measure from the finished floor, not the subfloor. Tile plus thinset can add 1/2″ to 1″, and a mud bed for a custom pan can add much more. If you rough in to the plywood and then build up an inch of tile, every one of your heights just shifted down an inch.
How deep should the shower valve sit in the wall?
The shower valve should sit at the depth the manufacturer marks on the plaster guard — usually so the finished wall surface (tile face) falls within a printed “min/max” window on the valve’s protective cap. This is the single most common rough-in mistake, and it has nothing to do with height.
Every valve body ships with a plastic plaster guard (also called a mud guard). On it, you’ll find molded lines labeled something like “finished wall min” and “finished wall max.” Your job is to set the valve so that when all the wall layers are stacked up — backer board, thinset, and tile — the front tile face lands between those two lines. If the valve sits too deep, your trim kit’s escutcheon won’t reach the wall and you’ll see a gap. If it sits too shallow, the trim won’t seat and the handle may bind.
So before you nail anything, add up your wall buildup: cement board (typically 1/2″), thinset (~1/8″), and tile (1/4″ to 3/8″ for most porcelain). That total tells you where the finished face lands, and you shift the valve in or out on its cross-brace until the guard’s window brackets that plane. When you later move to trim, this depth is exactly why a clean valve rough-in makes the finish work painless — see our step-by-step guide on how to install a shower faucet trim kit yourself.
Where should the valve be centered — and does it have to line up with the drain?
Center the valve horizontally on the wall where the person will stand, and put it on the same vertical centerline as the tub spout and showerhead so everything stacks in one clean plumb line. It does not have to align with the drain, but it should align with the fixtures above and below it.
In a standard 60-inch alcove tub, that usually means centering the whole plumbing wall stack — spout, valve, and showerhead riser — roughly in the middle of the wet wall. In a larger custom shower, installers often place the valve near the entry so you can reach in and turn the water on before stepping under a cold spray. That “reach-in” placement is a small comfort detail that separates a thoughtfully installed shower from a merely functional one.
Vertically, run a plumb line from the showerhead drop-ear down through the valve to the tub spout. When they share a centerline, your finished wall reads as intentional and your escutcheons look symmetrical. When they don’t, no amount of good tile work will hide the drift.
Rough-in dimensions at a glance
| Component | Typical rough-in height (from finished floor) | Notes |
|---|---|---|
| Tub/shower valve | 28″ above tub floor | Lower because you reach down to it |
| Standing shower valve | 42″–48″ | 45″ is the common default |
| Tub spout | ~4″ above tub rim | Keep on valve centerline |
| Showerhead / shower arm | 78″ (raise to 80″+ for tall users) | Drop-ear elbow anchored to blocking |
| Handheld slide bar (top mount) | 72″–78″ | Bottom bracket ~36″–48″ |
Does the rough-in change for a rainfall head, a handheld, or a tub spout?
Yes — the valve height itself stays in the same 42–48″ comfort zone, but what you rough in above the valve changes significantly depending on your showerhead style. The valve controls temperature; the outlets determine your overhead plumbing.
For a rainfall head, you’re often feeding a ceiling-mounted or high wall-mounted arm, which means the supply drop and blocking sit much higher than a standard 78″ wall arm. Because a rain head sprays straight down, mounting height is a real decision, not a default — we break the numbers down in our guide to the right rainfall shower head mounting height. For a handheld on a slide bar, you’ll rough in a supply elbow for the bar’s top connection plus solid blocking behind both mounting brackets. For a tub spout, you drop a short stub-out about 4″ above the tub rim, on the valve centerline.
If your build includes a diverter — say, a valve that switches between a fixed head and a handheld, or between a rain head and body sprays — the rough-in gets more involved because you’re running multiple outlets from one valve body. Multi-function and diverter valves have their own outlet layout; if that’s your setup, read the Delta diverter valve installation instructions before you commit to outlet positions in the wall.
Pressure-balance vs. thermostatic: which valve should you rough in?
For most single-showerhead bathrooms, rough in a pressure-balance valve; choose a thermostatic valve if you’re running multiple outlets at once (rain head + body sprays + handheld) or you want to dial in an exact temperature. Both mount at the same height, so this choice is about performance, not rough-in geometry.
A pressure-balance valve reacts to sudden pressure drops — like a toilet flushing elsewhere — and keeps the hot/cold ratio steady so you don’t get scalded or frozen. It’s the code-required anti-scald standard in most U.S. residential showers and it’s what the vast majority of homes use. A thermostatic valve goes further: it holds a set temperature regardless of flow, and it can drive several outlets simultaneously, which is why it’s the go-to for luxury multi-spray systems.
| Feature | Pressure-balance valve | Thermostatic valve |
|---|---|---|
| Temperature control | Maintains hot/cold ratio | Holds exact set temperature |
| Best for | Single showerhead | Multiple simultaneous outlets |
| Typical cost | Lower | Higher |
| Anti-scald compliance | Yes (ASSE 1016) | Yes (often ASSE 1017 + 1016) |
| Rough-in height | 42″–48″ | 42″–48″ |
Whichever you pick, the anti-scald function is set at rough-in or trim-out via a rotational limit stop. Getting that limit dialed in correctly is closely related to how you set your mixing valve overall — our piece on the right mixing valve installation level covers how high to set it and why.
What are the most common shower valve rough-in mistakes?
The most common rough-in mistakes are setting the valve too deep in the wall, forgetting to account for tile thickness on the floor, mounting the valve off the fixture centerline, and skipping solid backing for the showerhead drop-ear. Each one is cheap to prevent and expensive to fix after tile.
- Valve too deep: The tile face falls behind the plaster guard’s minimum line, so the escutcheon can’t reach the wall. Fix your wall buildup math first.
- Measuring from the subfloor: Tile and mud beds raise the floor. Always rough in from the finished floor height.
- Off-center stack: Valve, spout, and head don’t share a plumb line, and the finished wall looks crooked.
- No blocking: The showerhead drop-ear elbow and any slide bar need solid wood blocking between studs, or they’ll flex and leak over time.
- Inlets reversed or unlabeled: Hot and cold must connect to the marked ports. Reversed lines make anti-scald limits meaningless — and if you’ve ever had this go wrong on a kitchen faucet, you’ll recognize the symptom from our guide on why a faucet only puts out hot water.
- Pressure-testing skipped: Always cap the outlets and pressure-test the soldered or PEX connections before you close the wall.
Can you set the rough-in yourself, or should you hire a plumber?
If you’re comfortable with copper sweating or PEX crimping, can read a plaster guard, and understand your local code, a shower valve rough-in is a realistic DIY project for one careful afternoon. If your walls are already open for a remodel and you’re not touching the main stack, most confident DIYers can do it. Hire a plumber when you’re relocating supply lines, working inside a load-bearing wet wall, or unsure about permit requirements.
The physical mounting is not hard: you fasten the valve to a cross-brace (2×4 between studs), connect hot to the hot-side port and cold to the cold-side port, run the outlet up to the shower arm, add the tub-spout stub if needed, and set depth against the guard. The skill is in the details — plumb, level, depth, and leak-free joints. Many valve bodies are compatible across a brand’s trim lines, so choosing a reputable valve now keeps your options open when you shop finishes later. If you’re weighing full systems, our roundup of which shower system brands are actually worth buying is a good next stop.
A quick rough-in sequence
- Confirm finished floor height (include tile + thinset).
- Mark valve center height (42–48″ standing; 28″ above tub floor for combos).
- Install cross-brace and mount valve body plumb.
- Set depth so tile face lands inside the plaster guard window.
- Connect hot/cold to labeled ports; run outlet to head and spout.
- Add blocking for the drop-ear elbow and any slide bar.
- Cap outlets, pressure-test, then close the wall.
FAQ
What is the typical shower valve rough in height for a walk-in shower?
For a walk-in (no tub), rough in the valve 42 to 48 inches above the finished floor, with 45 inches being the most common. That puts the handle at a comfortable arm height so you’re not bending down to adjust temperature.
How high above the tub should the shower valve be?
In a tub/shower combo, set the valve about 28 inches above the tub floor, or roughly 8 to 18 inches above the tub rim. It sits lower than a walk-in valve because you often reach down to it while filling the tub or sitting.
How do I know if my valve is set at the right depth?
Check the plaster guard that ships on the valve. It has molded “finished wall min” and “max” lines. Your finished tile face must fall between them. Add up your backer board, thinset, and tile thickness before mounting, then adjust the valve in or out to match.
Does the valve need to line up with the drain?
No. The valve does not have to align with the drain. It should align vertically with the tub spout and showerhead so all three share one plumb centerline, and horizontally it should sit where the user comfortably reaches it.
Can I replace just the trim without redoing the rough-in?
Usually yes, as long as your new trim kit is compatible with the existing valve body. Many brands keep the same valve across multiple trim styles, so you can swap finishes or handle styles without opening the wall — the rough-in stays put.
About the author: This guide was written by the wewefaucet fixtures team, drawing on hands-on installs of pressure-balance and thermostatic shower valves across tub/shower combos and custom walk-ins. At wewefaucet, we design and test shower valves and trim kits to meet U.S. anti-scald standards (ASSE 1016), and our valve bodies are backed by a manufacturer warranty so your rough-in investment is protected for the long haul. When a rough-in dimension in this article differs from your specific valve’s printed instructions, always follow the manufacturer’s spec sheet and your local plumbing code.
您好!please sign in