 WEWE Kitchen Faucets
How Do You Install a Shower Valve Rough In the Right Way the First Time?
Views:3632 classificationInstall
If you’re standing in a gutted bathroom wondering how to install shower valve rough in work correctly, the good news is that it’s very doable as a DIY project — but it’s the one plumbing step you absolutely cannot rush, because once the tile is up, a mistake means tearing the whole wall back open. The “rough in” simply means installing the valve body and all the pipes hidden inside the wall before the drywall, backer board, and tile go on. Get the depth, height, and connections right at this stage and the trim (the handle and escutcheon you actually see) drops on in ten minutes years down the road.
This guide walks through the whole thing the way a plumber friend would explain it over your shoulder: the exact measurements, the order of operations, the mistakes that cause leaks behind tile, and how to test it before you close everything up.
What exactly is a shower valve “rough in,” and why does it matter so much?
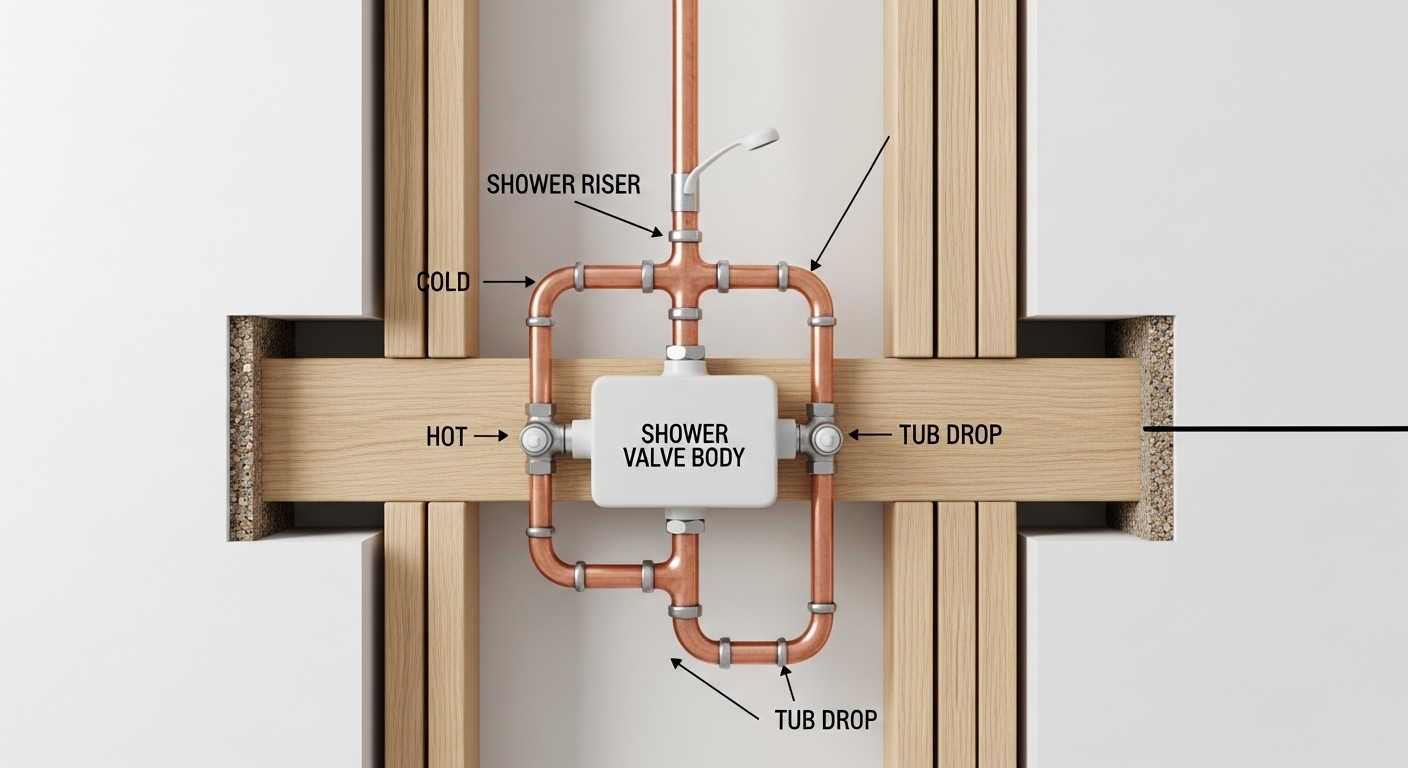
A shower valve rough in is the in-wall stage of installation: mounting the valve body (also called the mixing valve or cartridge housing) and plumbing all four of its ports — hot inlet, cold inlet, shower outlet, and tub outlet — while the wall is still open. It matters because everything visible later depends on where you set that valve now. The valve’s depth inside the wall determines whether your handle will actually reach and seal, and the height determines how comfortable the shower is to use.
Think of it in two phases. The rough-in is the plumbing you’ll never see again once the wall is closed. The trim-out is the finish work — handle, cartridge, escutcheon plate, showerhead, and spout — that happens after tile. The number one reason people have to rip open a finished shower wall is a botched rough-in depth, so slow down here and measure twice.
What’s the difference between a pressure-balance valve and a thermostatic valve?
A pressure-balance valve keeps water temperature steady by reacting to pressure changes (so you don’t get scalded when someone flushes a toilet), while a thermostatic valve holds a precise temperature you dial in and can run volume separately. For most homes, a single-handle pressure-balance valve is the standard, affordable choice and meets code. Thermostatic valves cost more and are worth it for large showers with multiple heads or if you want exact temperature control. Whichever you choose, the rough-in principles below are the same — the valve body just has more outlets on a thermostatic or diverter model.
| Valve type | Typical rough-in cost | Best for | Temp control |
|---|---|---|---|
| Pressure-balance (single handle) | $40–$120 | Standard tubs & showers | Anti-scald, one handle for temp + volume |
| Thermostatic | $150–$400 | Large/multi-head showers | Exact temp dial + separate volume |
| Tub-and-shower (with diverter) | $60–$180 | Combo tub/shower units | Anti-scald + spout/head switching |
| Shower-only | $50–$130 | Standalone showers (no tub) | Anti-scald, capped bottom port |
What height should you set a shower valve rough in from the floor?
Set the shower valve rough in at 42 to 48 inches above the finished floor for a standard standing shower — 48 inches is the most common, and it lands the handle at a comfortable reach for most adults. For a tub-and-shower combo, drop the valve to around 28 inches above the tub floor (or roughly 8–12 inches above the tub rim) so it’s reachable while you’re sitting. The showerhead arm, separately, roughs in at 78–80 inches for most people, though taller households often bump it to 82–84 inches.
These aren’t hard code numbers — they’re ergonomic sweet spots. The real rule is: put the valve where the person using it will comfortably reach it. If you’re building a curbless or accessible shower, keep the valve around 38–40 inches so it can be reached from a seated position. Mark your height on the stud with a pencil before you attach anything.
- Standing shower valve: 42–48 in. above finished floor
- Tub/shower combo valve: ~28 in. above tub floor
- Showerhead arm outlet: 78–80 in. (up to 84 in. for tall users)
- Tub spout outlet: ~4 in. above the tub rim
- Grab-bar / accessible valve: 38–40 in. for seated reach
How deep should the valve sit in the wall — how do you nail the rough-in depth?
The valve’s depth is controlled by the plaster guard (the plastic cap that ships on the valve), which is printed with “min” and “max” lines. Set the valve so your finished wall surface — meaning the face of the tile, not the backer board — lands between those two marks. That’s the single most important measurement in the entire rough-in, because if the valve sits too deep the handle won’t reach the cartridge, and if it sits too shallow the escutcheon won’t seal flat against the tile.
Here’s the practical way to get it right: add up your wall buildup. A typical wall is 1/2-inch cement backer board plus roughly 1/8–1/4 inch of thinset and tile — call it about 3/4 inch total off the face of the studs. Whatever that number is, the valve’s plaster guard needs to reference that finished plane, not the stud face. Most valves give you a 1/2-inch to 1-inch window between min and max, which is your margin for error. When in doubt, aim for the middle of the range.
What if you set the valve too deep or too shallow?
If the valve is too deep, the handle’s stem may not engage and the escutcheon plate will float away from the wall leaving a gap; if it’s too shallow, the valve body can protrude past the tile and the trim won’t sit flush. The fix in both cases is far easier before tile: reposition the valve on its cross brace. Many valve bodies also have a threaded or telescoping collar and some brands sell extension kits, but don’t rely on those to rescue a bad rough-in — set it right the first time. This is exactly the kind of tolerance issue we cover in our guide on bathroom sink supply line height, and the same “measure to the finished surface” discipline applies here.
What tools and materials do you need for a shower valve rough in?
You need the valve body, your supply pipe of choice (copper, PEX, or CPVC), a way to join it (torch and solder, PEX crimp/press tool, or CPVC cement), a mounting brace, and a few basics. Nothing exotic — but having it all staged before you start saves you a dozen trips to the hardware store with wet hands.
- Shower/tub valve body (pressure-balance or thermostatic) with plaster guard
- Supply lines: 1/2-inch copper, PEX, or CPVC (hot and cold)
- Shower riser pipe up to the shower arm drop-ear elbow (mounted to a brace)
- Tub spout nipple/drop (if a combo)
- Wood cross brace or a proprietary mounting bracket for the valve
- Torch + lead-free solder + flux (copper), or crimp/press tool (PEX), or cement (CPVC)
- Tape measure, level, tubing cutter, deburring tool, and Teflon tape for threaded joints
- Test caps or a pressure-test kit for checking your work before closing the wall
A note on pipe: 1/2-inch supply is standard for a single showerhead. If you’re feeding multiple body sprays or a big rain head, you may want 3/4-inch trunk lines feeding the valve so you don’t starve it — flow rate matters, and it’s worth understanding what GPM means for your fixtures before you commit to pipe size.
How do you actually connect the pipes to the valve — step by step?
Connect hot water to the left inlet, cold to the right inlet, the shower riser to the top outlet, and the tub spout to the bottom outlet — this orientation is stamped or cast right into the valve body, so read it before you plumb. Getting hot and cold reversed is one of the most common rough-in mistakes, and it means your “hot” side runs cold and the anti-scald calibration fights you.
Here’s the sequence:
- Mount the valve. Fasten the valve body to a wood cross brace or bracket between the studs at your marked height, with the plaster guard set to your finished-wall depth. Keep it plumb and level.
- Confirm orientation. Hot inlet left, cold inlet right, shower up, tub down. Look for the cast “H”/”C” or arrows.
- Dry-fit everything first. Cut and lay out all pipes and fittings before you join anything permanently. Measure the riser to the shower-arm elbow, which you’ll anchor to a brace.
- Make your joints. If soldering copper, remove the cartridge first — direct torch heat will destroy the rubber seals inside. Solder with lead-free solder. If PEX, crimp or press your fittings. If CPVC, prime and cement.
- Anchor the shower arm drop-ear. Screw the threaded drop-ear elbow to a solid brace so the shower arm has something rigid to thread into later. Use Teflon tape on threads.
- Cap and prep for testing. Screw test caps onto the outlets or install the trim stops so you can pressurize the system.
If your valve has integral service stops (little screwdriver-turn shutoffs on the inlets), you’ll appreciate them for years — they let you service the cartridge without shutting off the whole house. Speaking of cartridges, most single-handle leaks trace back to a worn one; if you ever chase a shower that won’t shut off, our breakdown of a shower faucet that keeps running when turned off covers the culprits. And the same lead-free, code-compliant fittings we recommend elsewhere apply here — pairing your valve with a quality threaded brass fitting at the connections is cheap insurance against corrosion.
How do you test a shower valve rough in before closing the wall?
Pressure-test the rough-in by capping all outlets, turning the water back on (or using a test kit at 80–100 psi), and watching every joint for at least 15–30 minutes for drips, seepage, or a pressure drop. Do this before a single sheet of backer board goes up — it’s the whole point of leaving the wall open. A joint that weeps a drop an hour becomes a wall full of mold in a year.
Two things people forget: check the joints when the system is both under static pressure and flowing (open the valve briefly with a temporary head so you test the outlet side too), and inspect for local permit requirements — many jurisdictions require an inspector to sign off on the rough-in before you close it. Getting that inspection is a feature, not a hassle; a second set of eyes catches problems while they’re still a five-minute fix.
| Rough-in mistake | What goes wrong | How to avoid it |
|---|---|---|
| Valve set too deep | Handle won’t engage; escutcheon gaps | Set finished wall between min/max on plaster guard |
| Hot/cold reversed | Temperature backwards; anti-scald off | Hot left, cold right — read the cast markings |
| Soldered with cartridge in | Melted seals, instant leak | Pull the cartridge before torching copper |
| No pressure test | Hidden leak behind finished tile | Cap & test 15–30 min before closing wall |
| Loose shower-arm elbow | Wobbly arm, cracked joint later | Anchor drop-ear elbow to a solid brace |
Can you install a shower valve rough in yourself, or should you hire a plumber?
You can absolutely DIY a shower valve rough in if you’re comfortable making watertight pipe joints and you have the wall open — thousands of homeowners do it every year and save $300–$600 in labor. Where you should call a pro: if the job requires moving or adding pipe inside a slab, if your local code demands a licensed permit and inspection you can’t pull yourself, or if you’re not confident soldering copper without setting the framing on fire.
A middle path a lot of people take: do the demo, framing, and pipe runs yourself, then have a plumber make the final valve connections and sign off. That’s often the cheapest way to a leak-free result. If budget is the driver, we’ve laid out more ways to trim the bill in our guide on how to save money on faucet installation. Whatever you decide, buy the valve first and read its instructions — brands differ, and the plaster-guard depth window is the one spec you must follow exactly.
FAQ
What is the standard rough-in height for a shower valve?
For a standing shower, 42–48 inches above the finished floor is standard, with 48 inches being the most common. For a tub-and-shower combo, set it lower — about 28 inches above the tub floor — so it’s reachable while seated in the tub. The showerhead arm itself roughs in separately at 78–80 inches.
Which side is hot and which is cold on a shower valve?
Hot water connects to the left inlet and cold to the right inlet, as you face the back of the valve during installation. The orientation is cast or stamped into the valve body — look for “H” and “C” markings or arrows. Reversing them defeats the anti-scald pressure-balance function, so double-check before you solder or crimp.
How far should a shower valve stick out from the stud?
Don’t measure from the stud — measure to your finished wall surface. The valve’s plaster guard has “min” and “max” lines printed on it, and your final tile face must land between them. In practice that usually means the valve sits recessed behind the studs, and the roughly 3/4 inch of backer board, thinset, and tile brings the finished surface forward into the guard’s window.
Do I need to remove the cartridge before soldering the valve?
Yes, if you’re soldering copper directly to the valve. The torch heat needed to solder will melt the rubber O-rings and seals inside the cartridge, causing an immediate leak. Pull the cartridge out, make your soldered joints, let the valve cool completely, then reinstall it. PEX and CPVC connections don’t have this problem since they use no open flame at the valve.
Can I replace a shower valve without opening the wall behind it?
Usually not the full valve body — the rough-in valve is plumbed inside the wall, so replacing the body means access from behind (an access panel) or opening the tile wall. However, you can almost always replace the cartridge inside an existing valve from the front, which fixes most drips, temperature, and shut-off problems without touching the rough-in at all. Try the cartridge first before you consider opening a wall.
What size supply lines do I need for a shower valve rough in?
Half-inch (1/2″) copper, PEX, or CPVC is standard and adequate for a single showerhead. If you’re feeding a large rain head, multiple body sprays, or a high-GPM setup, step the feeder trunk lines up to 3/4″ so the valve isn’t starved for volume. Match the pipe material to the rest of your system where possible for the cleanest, most reliable connections.
Author note: This guide was written by the WEWE Faucet product and installation team, who spec, bench-test, and field-install shower and tub valves across residential remodels. Our recommendations reflect hands-on rough-in work and real callbacks we’ve helped homeowners avoid.
About WEWE Faucet: WEWE (www.wewefaucet.net) designs and sells kitchen, bath, and shower fixtures built with lead-free, corrosion-resistant materials. Our pressure-balance and thermostatic shower valves are tested to meet ASME A112.18.1 / CSA B125.1 anti-scald standards, carry cUPC certification, and are backed by a limited lifetime warranty on the valve body — so the part you bury in the wall is the part you never have to think about again.
您好!please sign in