 WEWE Kitchen Faucets
Why Is My Bathroom Faucet Leaking, and How Do I Fix a Leaky Bathroom Faucet Myself?
Views:25 classificationRepair
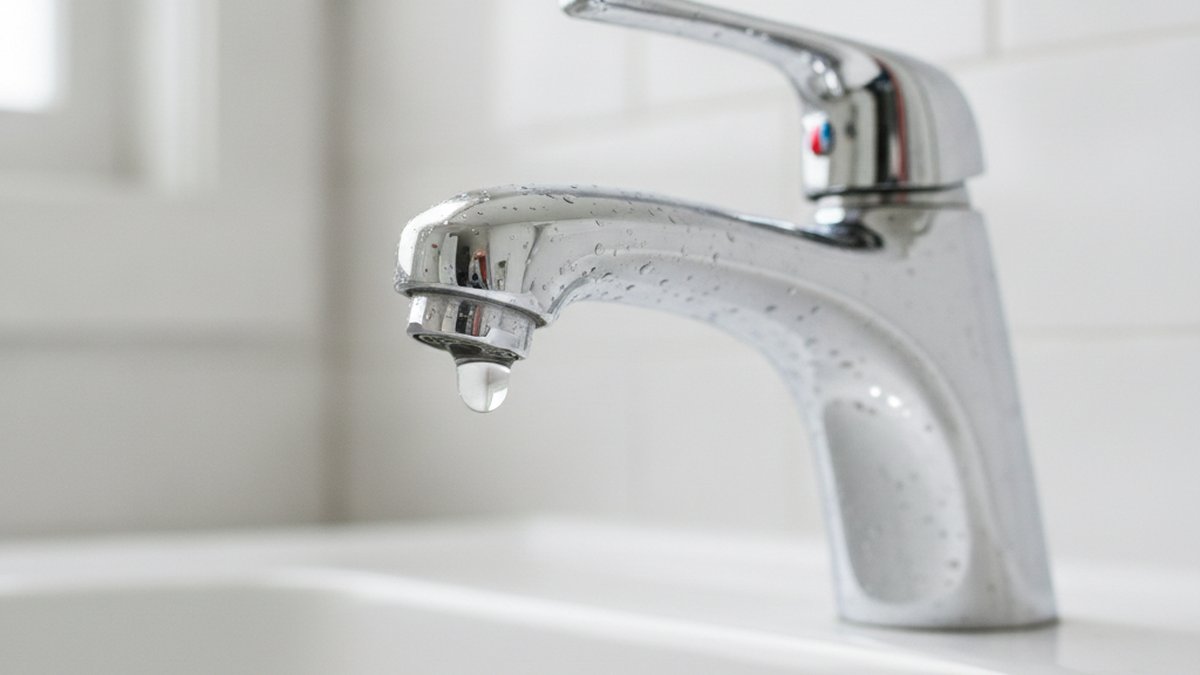
A leaky bathroom faucet is almost never a sign that the whole faucet is dead — in the vast majority of cases it’s a single worn seal inside the handle, and replacing it costs a few dollars instead of a few hundred. Before you panic or call a plumber, figure out where the water is actually coming from (the spout, the handle base, or under the sink), because that one detail tells you exactly which part failed and how to fix it.
At wewefaucet, we design and pressure-test faucets for a living, and the single most common warranty question we get is some version of “my faucet drips — is it broken?” Almost always, it isn’t. Below is the same diagnostic-and-repair walkthrough we’d give a friend standing in their bathroom, in plain English, with the real part names so you can walk into any hardware store and get the right thing the first time.
Why is my bathroom faucet leaking in the first place?
A bathroom faucet leaks because a rubber or ceramic seal inside it has worn out, hardened, or gotten gritty with mineral buildup — so it can no longer block water completely. Water is under constant pressure behind those seals 24/7, and the moment one degrades, you get a drip. That’s it. It’s a wear part doing what wear parts do.
The specific culprit depends on your faucet type. Here are the four parts that cause nearly every leak:
- Washer — a flat or cone-shaped rubber ring in older compression faucets (two separate hot/cold handles). When it flattens or cracks, the faucet drips from the spout.
- O-ring — a small rubber loop around the base of the spout or valve stem. A worn O-ring usually causes a leak at the base of the handle, not the spout.
- Cartridge — a plastic-and-rubber (or ceramic) insert inside most modern single-handle and many two-handle faucets. When it wears, you get spout drips, temperature problems, or handle stiffness.
- Valve seat — the metal surface the washer presses against. If it corrodes or pits, even a brand-new washer will leak.
Hard water is the accelerator behind most of this. Calcium and magnesium deposits chew through rubber seals and scratch ceramic discs years before they’d otherwise fail. If your area has hard water, expect to do this repair a little more often — and keep those fixtures clean, since scale buildup on the outside usually means scale inside too. (Our guide to the best bathroom faucet cleaner for hard water covers how to keep deposits from wrecking your seals in the first place.)
How do I tell where the leak is actually coming from?
Dry the whole faucet completely, then watch it for a few minutes with the handle off — the spot where water reappears first tells you the failed part. This 60-second test saves you from buying the wrong repair kit.
Use this quick reference to match the symptom to the cause:
| Where the water shows up | Most likely cause | Typical fix |
|---|---|---|
| Dripping from the spout when the handle is off | Worn washer, cartridge, or valve seat | Replace washer/cartridge; reface or replace seat |
| Pooling around the base of the handle | Worn O-ring or loose packing nut | Replace O-ring; tighten or repack the nut |
| Water under the sink on the supply lines | Loose connection or failed supply hose | Tighten fittings; replace supply line |
| Leak only when water is running, from the drain area | Not the faucet — it’s the drain/P-trap | Reseal drain or tighten P-trap |
| Wet spot behind the wall / low water pressure | Cracked valve body or pipe | Call a licensed plumber |
That last row matters. If water is coming from behind the wall or you see a persistent damp patch on drywall, stop — that’s a job for a pro, and continuing to DIY can turn a $10 fix into water damage. Everything else on this list is a genuine weekend project.
What tools and parts do I need to fix a leaky bathroom faucet?
You need an adjustable wrench, a Phillips and a flat-head screwdriver, an Allen/hex key set, plumber’s grease, and the correct replacement seal for your faucet — total cost is usually under $30, and you may already own most of it. Buying the exact replacement part is the only step where people go wrong.
Here’s the short shopping list:
- Adjustable wrench (and ideally slip-joint pliers) to loosen the retaining/packing nut.
- Screwdrivers and a hex key set — most handle set screws are tiny Allen bolts.
- The right repair part. For cartridge faucets, note the brand and model (it’s often stamped under the handle or in your original paperwork) and buy that exact cartridge. For compression faucets, take the old washer to the store and match diameter and thickness exactly.
- Plumber’s grease (silicone-based) to lubricate new O-rings and seals so they seat properly and last.
- White vinegar and an old toothbrush to dissolve mineral scale off the parts you’re reusing.
One tip that saves a second trip: many manufacturers sell a complete “repair kit” for a given faucet model that bundles the cartridge, O-rings, and washers together. If you can find yours, buy it — it’s cheaper than guessing which single part failed, and you replace everything worn at once. If you’re not sure your supply lines are the right fit while you’re under there, our guide on how to measure faucet supply line size walks through it so a new hose actually threads on.
How do I fix a leaky single-handle bathroom faucet, step by step?
Shut off the water, pop off the handle, pull the old cartridge, drop in the new one, and reassemble — most single-handle faucets take about 30–45 minutes. Single-handle faucets almost always use a cartridge, so this is the most common repair people do.
- Shut off the water. Turn the two shutoff valves under the sink clockwise until they stop. Then open the faucet to release pressure and confirm the water is actually off. Plug the drain so you don’t lose small parts.
- Remove the handle. Find the set screw — usually a small hex bolt behind or under the handle, sometimes hidden under a decorative cap you pop off with a flat-head. Loosen it and lift the handle straight up.
- Remove the retaining nut and clip. Under the handle you’ll find a retaining nut (loosen with your wrench) and often a small U-shaped brass or plastic clip holding the cartridge in place. Pull the clip straight out with pliers and keep it — you’ll reuse it.
- Pull the cartridge. Grip the cartridge stem and pull straight up. If it’s stuck with mineral buildup (common), rock it gently or use a cartridge-puller tool. Note its orientation — it usually only goes back in one way, and getting it backwards reverses your hot and cold.
- Install the new cartridge. Lubricate the new O-rings with plumber’s grease, slide the cartridge in matching the original orientation, and reinsert the retaining clip and nut.
- Reassemble and test. Put the handle back on, tighten the set screw, then turn the shutoff valves back on slowly. Run the faucet and check for drips at the spout and base.
If your leak was pooling at the base rather than dripping from the spout, you likely just need to replace the O-rings around the spout body instead of the whole cartridge — same teardown, cheaper part.
How is fixing a two-handle (compression) faucet different?
A two-handle compression faucet uses a rubber washer and a valve seat instead of a cartridge, so you fix the leak by replacing the washer at the bottom of the valve stem — and, if that doesn’t fully stop it, refacing or replacing the valve seat. The teardown is similar, but the failing part is different.
Figure out which handle is leaking first: turn off one shutoff at a time and see if the drip stops. That tells you whether it’s the hot or cold side, so you only rebuild the one that failed. Then:
- Remove the handle and use your wrench to unscrew the valve stem (the brass piece that threads down into the faucet body).
- At the bottom of the stem you’ll find a washer held by a brass screw. Replace it with an exact-size match.
- While it’s apart, replace the O-ring on the stem too — it’s cheap insurance against a base leak.
- Feel inside the faucet body for the valve seat. If it’s rough or pitted, a new washer won’t seal. Use a seat wrench to remove and replace it, or a seat-dressing tool to smooth it.
Compression faucets are older technology, so if yours is decades old and the body is corroded, this repair is also a good moment to consider a full replacement with a modern cartridge or ceramic-disc faucet that simply won’t drip as often. If you’re weighing an upgrade on a budget, we rounded up the best bathroom faucets under $100 that actually last — several use ceramic-disc valves rated for hundreds of thousands of cycles.
When should I just replace the faucet instead of repairing it?
Replace the faucet — don’t repair it — when the body is cracked or badly corroded, when replacement cartridges are discontinued for your model, or when you’ve already rebuilt it and it still leaks. As a rule of thumb, if parts cost more than half the price of a decent new faucet, or the fixture is 15–20+ years old, replacement is the smarter money.
Repair makes sense when: the faucet is a known brand with readily available parts, the finish and body are still in good shape, and the leak traces to a single worn seal. Replace when: you can’t source the cartridge, the valve seat is corroded beyond dressing, or you’re fighting recurring leaks on a cheap builder-grade unit that was never going to last.
One more honest point: the internal quality of the valve is what determines whether you’re back under the sink next year. A brass or stainless valve body with a ceramic-disc cartridge will outlast a plastic-bodied faucet many times over. That’s the difference you’re paying for when you buy up a tier — not the shine of the finish. If your leak is actually at a bathtub faucet rather than the sink, the mechanics are similar but the access is different; our step-by-step on how to fix a leaky bathtub faucet, Moen style covers that specific case.
How do I keep a bathroom faucet from leaking again?
Prevent future leaks by descaling the faucet a few times a year, going easy on the handles, and replacing seals proactively if you have hard water — most premature leaks are just accelerated mineral wear. A faucet you maintain will run drip-free for a decade or more.
- Descale regularly. Mineral scale is the number-one enemy of every seal in your faucet. Wipe and periodically soak the aerator and clean the finish so grit doesn’t migrate into the valve.
- Don’t crank the handles. Overtightening a faucet to stop a drip just crushes the seals faster. A properly working faucet shuts off with light pressure.
- Fix drips early. A slow drip wears the valve seat and wastes real water — a single dripping faucet can waste over 3,000 gallons a year. Catching it early keeps a $5 washer job from becoming a seat-replacement job.
- Consider a whole-house filter or softener if your water is very hard — it protects every fixture, not just this one.
FAQ
How much does it cost to fix a leaky bathroom faucet myself?
Between about $5 and $30 in parts if you DIY it: a single washer or O-ring is a few dollars, while a brand-specific cartridge or full repair kit runs $10–$25. Calling a plumber typically costs $125–$300 including labor, so doing it yourself saves the most on a repair that’s genuinely beginner-friendly.
Can a leaky faucet raise my water bill?
Yes. A steady drip from a single bathroom faucet can waste 2,000–3,000+ gallons of water a year, and hot-side leaks also waste the energy used to heat that water. It’s small per minute but adds up on your bill, which is why it’s worth fixing promptly rather than living with it.
Why does my faucet still drip after I replaced the cartridge?
Usually one of three things: the cartridge is slightly the wrong model, an O-ring wasn’t seated or greased properly, or the real problem is a corroded valve seat rather than the cartridge. Double-check you bought the exact part for your faucet’s brand and model, and inspect the valve seat for pitting — a rough seat will leak no matter how new the cartridge is.
Do I need to turn off the main water supply to fix a bathroom faucet?
No — in almost all cases you only need to close the two shutoff valves directly under the sink, then open the faucet to relieve pressure. Only shut off the main if those under-sink valves are missing, seized, or leaking themselves. Always confirm the water is actually off before you take anything apart.
Is a dripping spout the same problem as a leak at the base of the handle?
No, they point to different parts. A drip from the spout with the handle off usually means a worn washer, cartridge, or valve seat, while water pooling around the base of the handle points to a worn O-ring or a loose packing/retaining nut. Identifying which one you have tells you exactly which cheap part to buy.
How long should a bathroom faucet last before it starts leaking?
A quality faucet with a ceramic-disc cartridge and a brass body can run 15–20 years, and the internal seals often last a decade before needing a simple refresh. Cheaper plastic-bodied faucets may start dripping in just a few years, especially in hard-water areas — which is why the valve material matters far more than the finish when you buy.
About the author: This guide was written by the wewefaucet product team, which designs, stress-tests, and services bathroom and kitchen faucets year-round. We pressure-cycle our cartridges to industry durability standards (hundreds of thousands of open-close cycles) and back our fixtures with a manufacturer warranty, so the repair advice here comes from the same people who diagnose these leaks under warranty every week. When a fix crosses into in-wall plumbing or a cracked valve body, we’ll always tell you to call a licensed plumber — because that’s the honest call, not the DIY one.
您好!please sign in