 WEWE Kitchen Faucets
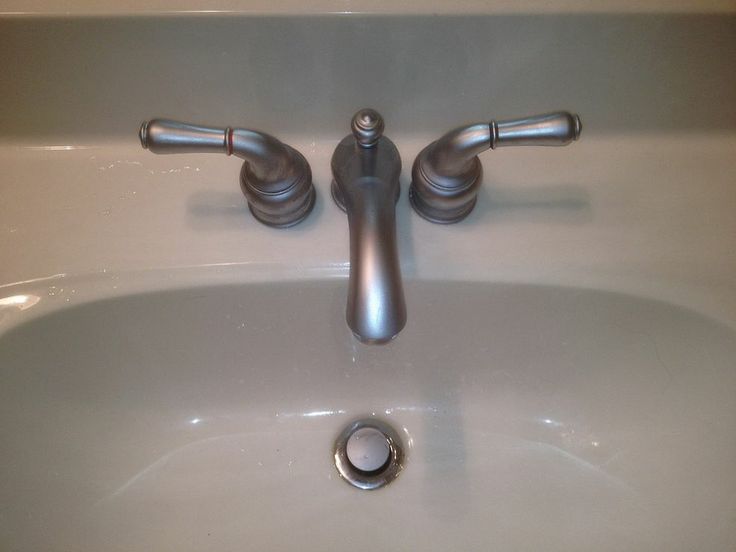
How to Fix A Stiff Faucet Handle That Hard to Turn
Views:521 classificationBlog classificationFaucet Knowledge
A stiff faucet handle is more than just an inconvenience—it can be a sign that something’s not quite right with your faucet, and it can make it much harder to get the perfect water temperature when you need it. Whether it’s in your kitchen, bathroom, or laundry room, dealing with a hard-to-turn faucet handle can quickly become frustrating. Luckily, in most cases, it’s a problem that can be fixed with some basic troubleshooting and a few tools.
In this post, we’ll explore the common causes behind stiff faucet handles and provide step-by-step instructions on how to fix the issue.
Why Is My Faucet Handle Stiff?
Before diving into the repair process, it’s helpful to understand why your faucet handle is hard to turn. Several factors can contribute to this issue:
-
Corrosion or Mineral Buildup: Hard water deposits, rust, or corrosion can accumulate on internal faucet parts, especially the valve and cartridge. Over time, these deposits can make it more difficult for the handle to operate smoothly.
-
Worn or Damaged Parts: The internal components of the faucet—like the cartridge, valve stem, or washer—can wear out after years of use. When these parts deteriorate, they may no longer operate as easily, causing the handle to become stiff.
-
Loose Handle or Mounting Screws: If the faucet handle isn’t securely attached to the faucet, it can cause difficulty when turning the handle. Loose mounting screws may be the culprit, making it feel like the handle is tight or stuck.
-
Grease or Lubricant Issues: If the faucet components are poorly lubricated, they may not move as freely, resulting in a stiff handle. This can happen if the faucet wasn’t properly maintained or if the lubricant has dried out.
Step-by-Step Guide to Fixing a Stiff Faucet Handle
Now that we’ve identified some common causes of a stiff faucet handle, let’s walk through the process of fixing it. Depending on the cause, the repair may be relatively simple or may require replacing certain parts.
Step 1: Turn Off the Water Supply
Before you start disassembling the faucet, it’s essential to turn off the water supply to avoid any water leaks or potential flooding while you’re working. Most faucets have shut-off valves under the sink. Simply turn these valves clockwise to shut off the water supply.
If your faucet doesn’t have individual shut-off valves, you’ll need to turn off the main water supply for your home. Make sure to open the faucet to release any residual water pressure.
Step 2: Inspect the Faucet Handle and Remove It
Once the water is turned off, the next step is to examine the faucet handle closely. Look for any visible signs of wear, such as rust, corrosion, or buildup of mineral deposits. If you have a single-handle faucet, remove the handle by unscrewing the retaining screw (usually hidden under a decorative cap on the top of the handle). For double-handle faucets, remove both handles using the same process.
In some cases, the screw may be difficult to loosen, especially if it’s rusted or corroded. You can use a penetrating oil (like WD-40) to loosen the screw. Apply the oil to the screw, let it sit for a few minutes, and then attempt to unscrew it again.
Step 3: Check the Faucet Cartridge or Valve Stem
After removing the handle, take a look at the internal components of the faucet, such as the cartridge or valve stem. If you have a compression faucet, you’ll see a valve stem and rubber washers. In cartridge-style faucets, you’ll find the cartridge that controls water flow and temperature.
Check for any obvious signs of wear, corrosion, or mineral buildup. If you notice any damage or excessive buildup, it’s likely that the issue lies with these parts.
Solution for Mineral Buildup or Corrosion:
If the faucet components are corroded or have mineral buildup, you can clean them using a mixture of white vinegar and water. Soak the affected parts in the vinegar solution for about 30 minutes to dissolve mineral deposits. After soaking, scrub the parts with an old toothbrush to remove any remaining residue.
If the corrosion is too severe to clean off, you may need to replace the damaged parts entirely. Most faucet parts are relatively inexpensive and easy to find at local hardware stores or online.
Solution for Worn or Damaged Cartridge or Valve Stem:
If the cartridge or valve stem is worn out, it’s best to replace it with a new one. Take the old part to a hardware store to ensure you get an exact match. Replacing the cartridge or valve stem is typically straightforward—just remove the old part and install the new one in the same position.
Step 4: Lubricate the Internal Parts
If the parts inside your faucet are in good condition but the handle is still stiff, the issue may be a lack of lubrication. Applying a lubricant to the moving parts of the faucet can make it easier to turn the handle.
Use a silicone-based lubricant (avoid petroleum-based lubricants as they can degrade rubber seals) and apply it to the valve stem, cartridge, or any other moving components. Be sure to apply the lubricant sparingly, as too much can attract dirt and debris, leading to future issues.
Once you’ve lubricated the internal components, move the parts back into place and reassemble the faucet.
Step 5: Tighten the Handle and Reassemble the Faucet
Before reattaching the handle, make sure that the faucet is securely mounted and that any loose screws are tightened. If the mounting screws or handle were loose, this could be contributing to the stiffness when turning the handle.
Reassemble the faucet handle by aligning it properly and tightening the retaining screw. Test the handle to ensure it turns smoothly. If the handle feels loose or doesn’t turn freely, check that the parts are correctly positioned and that all screws are tightened securely.
Step 6: Turn the Water Supply Back On
Once you’re satisfied with the repairs, turn the water supply back on. Check for leaks around the faucet handle and ensure that the handle now turns easily. You should notice a significant improvement in the smoothness of the handle’s operation.
Preventative Tips to Avoid Future Stiff Faucet Handles
To keep your faucet handles from becoming stiff again in the future, consider these preventative tips:
- Regular Cleaning: Periodically clean the faucet and its components to remove mineral buildup and prevent corrosion. Use vinegar or a mild cleaner to clean the faucet parts.
- Lubrication: Apply silicone-based lubricant to the faucet’s internal moving parts every 6 months to keep things running smoothly.
- Install a Water Softener: If you live in an area with hard water, consider installing a water softener to reduce mineral buildup in your faucet and plumbing.
- Replace Worn Parts: Over time, faucet parts can wear out. If you notice any signs of damage, such as rust or cracks, replace the affected parts promptly to prevent further issues.
Conclusion
A stiff faucet handle can be caused by several factors, including mineral buildup, worn components, loose screws, and lack of lubrication. By following the steps outlined above, you can identify the cause of the stiffness and restore your faucet to its original smooth-functioning state. Regular maintenance, such as cleaning, lubrication, and part replacement, can also help prevent future issues. With a little time and effort, you’ll be able to fix your stiff faucet handle and enjoy a smoother, more reliable faucet once again.
您好!please sign in