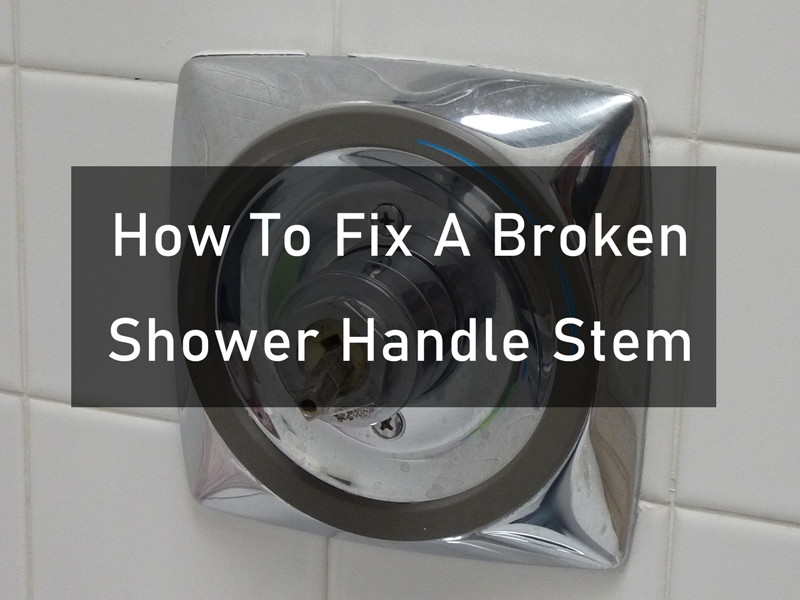
A broken shower handle stem can be a frustrating issue, disrupting your daily routine and leaving you without the convenience of a functional shower. Fortunately, repairing a broken shower handle stem is a manageable task that doesn’t always require professional assistance. In this comprehensive guide, we’ll walk you through the step-by-step process of fixing a broken shower handle stem, from diagnosing the problem to implementing effective solutions.
Diagnosing the Issue:
Before diving into the repair process, it’s crucial to identify the specific problem with the shower handle stem. Common issues include a stripped or cracked stem, a loose or damaged set screw, or a malfunctioning cartridge. Here’s how to diagnose the problem:
- Loose Set Screw:
- Check for a set screw on the side or base of the handle. If it’s loose, the handle may wobble or come off easily.
- Tighten the set screw using an appropriate screwdriver or Allen wrench.
- Stripped or Cracked Stem:
- If the handle won’t turn or feels loose, the stem may be stripped or cracked.
- Remove the handle and inspect the stem for any visible damage.
- Malfunctioning Cartridge:
- If the handle turns but doesn’t control the water flow properly, the cartridge inside the valve may be faulty.
- Prepare for a cartridge replacement if needed.
Tools and Materials:
Before starting the repair process, gather the necessary tools and materials to ensure a smooth and efficient fix. You may need:
- Screwdrivers (Phillips and flathead)
- Allen wrenches
- Adjustable wrench
- Replacement parts (if required)
- Plumber’s tape
- Lubricant (silicone-based)
Step-by-Step Repair Guide:

Step 1: Turn Off Water Supply
Before beginning any repairs, turn off the water supply to the shower. Locate the shut-off valve, usually found in the bathroom or basement, and close it to prevent water flow to the shower.
Step 2: Remove the Handle
Use a screwdriver or Allen wrench to remove the set screw securing the handle to the stem. Once the screw is removed, gently pull or twist the handle to detach it from the stem. Some handles may have a decorative cap covering the set screw, so be sure to check for and remove this cap if necessary.
Step 3: Inspect the Stem
Examine the exposed stem for any visible damage. If it’s cracked or stripped, you may need to replace the stem. Consult the manufacturer’s instructions for information on obtaining the correct replacement part.
Step 4: Replace the Stem (if necessary)
If a replacement stem is required, carefully follow these steps:
- Remove the retaining nut using an adjustable wrench.
- Pull the old stem out of the valve body.
- Insert the new stem, making sure it aligns correctly with the valve body.
- Tighten the retaining nut securely.
Step 5: Lubricate the Stem
Apply a small amount of silicone-based lubricant to the stem. This helps ensure smooth movement and prevents future issues with the handle.
Step 6: Reattach the Handle
Slide the handle back onto the stem and secure it in place by tightening the set screw. Ensure that the handle fits snugly and doesn’t wobble.
Step 7: Test the Repair
Turn the water supply back on and test the repaired shower handle. Check for smooth operation and ensure that the handle effectively controls the water flow and temperature.
Step 8: Reassemble and Seal
If the repair was successful, reassemble any additional components, such as decorative caps or escutcheon plates. Use plumber’s tape to seal any connections and prevent leaks.
Preventative Maintenance Tips:
To extend the life of your shower handle and prevent future issues, consider implementing these preventative maintenance tips:
- Regularly clean the handle and stem to remove soap scum and mineral deposits.
- Periodically lubricate the stem with silicone-based lubricant to maintain smooth movement.
- Check for loose set screws and tighten them as needed.
- Monitor water pressure to prevent excessive strain on the handle and stem.
By following this comprehensive guide, you can tackle the task of fixing a broken shower handle stem with confidence. Remember to take your time, use the appropriate tools, and, if necessary, consult the manufacturer’s instructions for specific guidance on replacement parts. With a bit of DIY spirit, you can restore your shower to full functionality and enjoy a hassle-free bathing experience.
 WEWE Kitchen Faucets
您好!please sign in