 WEWE Kitchen Faucets
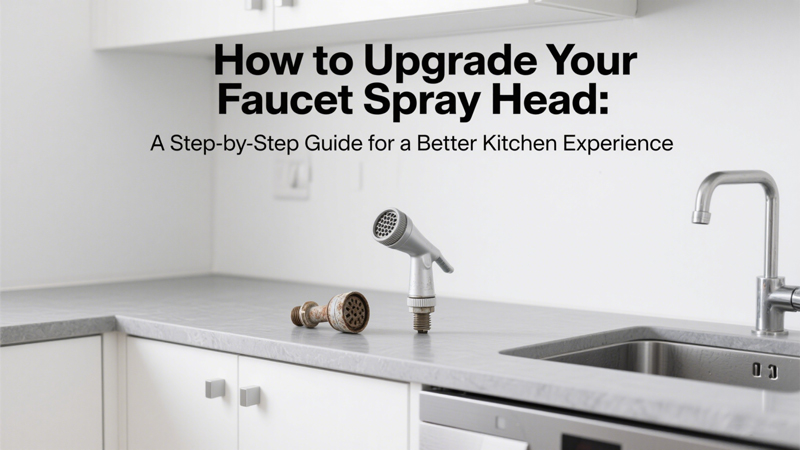
Upgrading your faucet spray head is one of the simplest and most impactful ways to refresh your kitchen without doing a full renovation. Whether your current spray head is leaking, clogged, outdated, or just not powerful enough, replacing it with a new model can improve water efficiency, add new functionality, and give your sink area a fresh look.
The good news? It’s a relatively easy DIY project that most homeowners can complete in under 30 minutes with minimal tools. In this guide, we’ll walk you through everything you need to know to upgrade your faucet spray head, from choosing the right model to installation and maintenance tips.
Why Upgrade Your Faucet Spray Head?
Before we dive into the how-to, let’s take a look at some of the top reasons people upgrade their faucet spray heads:
-
Improved Water Pressure: Older spray heads can get clogged with mineral deposits, reducing performance.
-
Added Functions: Newer models often feature multiple spray modes (stream, spray, pause, etc.).
-
Water Efficiency: Many modern heads are designed to use less water while maintaining strong pressure.
-
Style Update: Swapping an old plastic spray head for a sleek metal one can instantly modernize your kitchen.
-
Cost-Effective: For under $50, you can make your faucet feel brand new.
Step 1: Know What You’re Replacing
Before buying a new spray head, you need to identify your existing setup. There are two main types of faucet spray heads:
-
Pull-Out Faucet Heads – The entire faucet spout comes out of the base and doubles as a sprayer.
-
Pull-Down Faucet Heads – The sprayer is part of the high-arching neck and pulls downward into the sink.
You’ll also want to determine the connector type and hose threading. Most spray heads are threaded with either a ½-inch or ⅜-inch connection and come in male or female threads. To find out what you need:
-
Unscrew the current spray head by turning it counterclockwise.
-
Look at the threading and check the size (you can measure it or bring it to a hardware store for comparison).
Tip: Take a photo of your existing spray head and connector so you can compare when shopping online or in-store.
Step 2: Choose the Right Replacement

There are countless spray heads on the market, so pick one that suits your needs and budget. Key features to consider include:
-
Spray Modes: Many models offer at least two settings (stream and spray), while some offer pause or power-rinse options.
-
Finish: Match your new head to the finish of your faucet (chrome, brushed nickel, matte black, etc.).
-
Material: Metal spray heads are more durable and look sleeker than plastic ones.
-
Water Pressure Rating: Check the GPM (gallons per minute) to ensure a balance between performance and efficiency.
-
Universal Fit: Some brands offer universal spray heads that work with most major faucet brands like Moen, Delta, or Kohler.
Step 3: Remove the Old Spray Head
Now for the hands-on part. Here’s how to remove your old faucet spray head:
Tools You’ll Need:
-
Adjustable wrench or pliers (optional)
-
Towel or rag (to protect the finish)
-
Bucket or bowl (optional, in case of water drips)
Instructions:
-
Turn Off the Water Supply: This isn’t always necessary, but it’s a good precaution, especially if you plan to disconnect the hose.
-
Unscrew the Spray Head: Most spray heads can be twisted off by hand. If it’s tight or stuck, use pliers with a cloth to avoid scratching the finish.
-
Check the Hose and Washer: Inspect the hose end and remove any worn or dirty washers. Replace them if necessary.
-
Clean the Connection: Wipe off any mineral deposits or grime before installing the new head.
Step 4: Install the New Spray Head
Once your old spray head is off, installing the new one is a breeze.
Instructions:
-
Insert a New Washer (If Included): This prevents leaks.
-
Thread the New Head Onto the Hose: Carefully align the threads and screw on by hand until snug.
-
Tighten Gently: If needed, use a wrench to give it a final turn, but don’t overtighten—it could damage the threads.
-
Test for Leaks: Turn the faucet on and run water through each spray setting. Check for drips around the connection point.
Step 5: Maintain Your New Spray Head
A little maintenance will keep your new spray head performing like new:
-
Regular Cleaning: Wipe down the nozzle with vinegar or a descaling solution to remove mineral buildup.
-
Check for Leaks: Periodically ensure the head is still snug and the washer hasn’t worn out.
-
Use Gently: Avoid yanking or overextending the hose to preserve the internal mechanism.
Final Thoughts
Upgrading your faucet spray head is a smart, budget-friendly home improvement project that offers immediate benefits. Whether you’re looking for better water pressure, a sleeker design, or new features like multi-mode spraying, there’s a perfect spray head out there for your faucet.
The entire process—from selecting a model to installation—can be done in under half an hour, even if you’re not especially handy. With just a few tools and a little know-how, you can transform the look and functionality of your kitchen sink in a single afternoon.
Pro Tip: If you’re planning a larger faucet upgrade soon, consider investing in a high-end spray head now that you can transfer to a new fixture later. Many universal models will work with future faucets, so you’re not locked in.
Happy upgrading!
您好!please sign in